An Overview on Remote Server Management
In enterprises that need a secure environment; servers and desktops are usually managed remotely. Administration is hardly performed by logging on to the local console. Remote management or administration is not a new notion, and is used largely to manage servers and desktops. Windows Server 2003 includes a few technologies which can be used for the administration of remote client computers, and to remotely manage servers. These include:
-
Microsoft Management Console snap-ins can be used to connect to a remote system and manage the remote system.
-
Web Interface for Remote Administration can be used to manage a server through a Web browser on a remote computer.
-
Remote Desktop For Administration: The Terminal Services service enables Remote Desktop For Administration and Remote Assistance. The Terminal Services service is automatically installed on Windows Server 2003, and can be set up to support Remote Desktop For Administration. Through Remote Desktop For Administration, Terminal Services can be used as a management tool. Two simultaneous remote connections are possible.
-
Remote Assistance: The Remote Assistance feature enables a client or user to request assistance from another user, normally an administrator or technician who is referred to as an expert. The expert is able to connect to the user's computer and view and control the user's desktop, to provide assistance is solving the user's issue.
Using Microsoft Management Console snap-ins to Remotely Manage Computers
The main administrative tools in Windows Server 2003 are MMC consoles which contain one or multiple tools, known as snap-ins. Snap-ins are specialized administration tools used for performing certain tasks which are added to an MMC console. Some MMC snap-ins can be used to manage the local computer, and remote computers. This means that you can create custom MMC consoles to manage local and remote servers. The MMC is made up of a console tree pane, a details pane, MMC menus and a MMC toolbar. An MMC console can be also be configured so that nobody is able to change it.
A MMC console which has no added snap-ins is basically a blank sheet or an empty MMC to which you can add administration tools or snap-ins. The console root would eventually include all the snap-ins which you add. Each snap-in that you add to an MMC adds its own unique MMC menu and MMC toolbar items.
The types of snap-ins that exist are:
-
Stand-Alone Snap-Ins: These are snap-ins which are provided by an application's developer for specific tasks. For instance, Administrative Tools for Windows Server 2003 are single snap-ins, or a collection of snap-ins used for a specific set of tasks.
-
Extension Snap-Ins: These are snap-ins which operates together with a stand-alone snap-in(s). The extension snap-ins operates with a stand-alone snap-in, based on the functionality associated with that particular stand-alone snap-in.
The MMC consoles can be saved in two modes, namely Author mode or User mode. The mode which the console is saved in determines what nodes in the console tree can be accessed, determines the snap-ins which can be added to the console, and the windows which can be created.
-
Author mode: This is the default mode in which a console is saved. It allows full access to the MMC, and the capability to change all aspects of the MMC, including the following:
-
View the console tree
-
Save the console
-
Add and remove snap-ins
-
Create windows, tasks, and taskpads views
-
Change options on the console
-
-
User mode: You can choose to save the console in user mode if you want to distribute an MMC. The user modes which you can choose between are listed below:
-
User mode – Full Access: Users are able to access the console tree, navigate between snap-ins, and open window. They have full access to the windowing commands. Users are however unable to add and remove snap-ins.
-
User mode – Limited Access, Multiple Windows: Users are able to view multiple windows in the console tree, but can only access those portions of the console that existed when it was saved.
-
User mode – Limited Access, Single Windows: Users are able to view a single window in the console tree, but can only access those portions of the console that existed when it was saved.
-
A few common menu items added by the majority of snap-ins are listed below:
-
File menu: Items on this menu allow you to perform the tasks listed below:
-
Create a new console
-
Add or remove snap-ins from the console
-
Open an existing console
-
Specify options for saving the console
-
Open recently utilized consoles
-
-
Action menu: Items on this menu allow you to perform the tasks listed below:
-
Export option
-
Import option
-
Configuration option
-
Help features for the snap-in
-
-
View menu: Include options which allow you to customize certain attributes of the console.
-
Favorites menu: Include the options which allows you to add saved consoles, and organize them.
-
Window menu: Includes options for navigating through and viewing the console, such as opening a new windows and child windows.
-
Help menu: The Help menu contains the MMC general help menu, and the help menu specific to the added snap-ins.
How to create a customized MMC console
-
Click Start, Run, and enter mmc in the dialog box. Click OK.
-
Select Add/Remove Snap-In from the File menu.
-
When the Add/Remove Snap-In dialog box opens, click Add.
-
This opens the Add Standalone Snap-in dialog box which displays the list of available snap-ins which you can add to the MMC.
-
Select the snap-in which you want to add, and then click Add.
-
On the Select Computer dialog box, select the computer which the snap-in would manage. You can choose to manage the Local Computer or Another Computer. Click Finish
-
Click Close in the Add Standalone Snap-In dialog box.
-
Click OK in the Add/Remove Snap-In dialog box.
-
The snap-in which you selected on the Add Standalone Snap-in dialog box now appears in the console tree.
-
Click Save from the File menu to save the MMC.
-
Enter a name for the MMC in the File Name box.
-
Click Save.
-
The saved console can now be accessed via the Administrative Tools Menu.
How to connect to and manage a remote computer
When you create a customized MMC console, and add snap-ins to it, you can choose that the MMC console be used to manage a remote computer. You can for the majority of snap-ins change the management focus of the particular snap-in. The account you use has to though have sufficient privileges on the target remote computer.
To do this,
-
In the console tree pane, right-click the snap-in, and select one of the following options from the shortcut menu:
-
Connect To Another Computer
-
Connect To Domain
-
Connect To Domain Controller
-
A console typically used to connect to and manage a remote computer is the Computer Management console. The Computer Management console is a preconfigured MMC console. The console is available on both client and server computers to perform Administrative tasks, and can be accessed from the Administrative Tools Menu.
The Computer Management nodes and the snap-ins which are available under each node are:
-
System Tools node, contains the following snap-ins
-
Event Viewer, used to display and view event logs
-
Shared Folders, used view shared folders and open files
-
Local Users and Groups, used to manage local users and groups
-
Performance Logs and Alerts, used to set up performance logs
-
Device Manager, used to manage hardware
-
-
Storage node, contains the following snap-ins
-
Removable Storage, used to manage devices which have removable media
-
Disk Defragmenter, used to the defragment local disks
-
Disk Management, used to configure and manage disk volumes and partitions.
-
-
Services and Applications node, contains the following snap-ins
-
Services, used to manage services
-
Indexing Service, used to configure the indexing service
-
WMI Control, used to configure WMI (Windows Management Instrumentation)
-
DHCP, used to configure the DHCP service
-
DNS, used to configure the DNS service
-
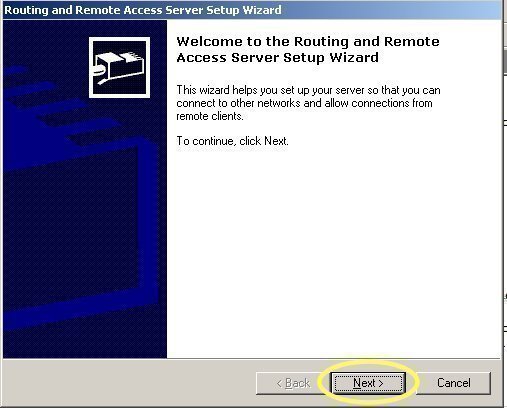
Routing and Remote Access, for managing remote access and routing
-
To manage a remote computer using the Computer Management console,
-
Click Start, right-click My Computer, and select Manage from the shortcut menu.
-
Right-click Computer Management in the console tree, and select Connect To Another Computer from the shortcut menu.
-
Enter the name or IP address of the computer in the Another computer box, or click the Browse button to browse for the remote computer on the network.
-
Click OK.
-
After the connection is established with the remote computer, you can perform the necessary administrative tasks on the particular computer.
Using Web Interface for Remote Administration for Remote Server Management
The Web Interface for Remote Administration tool of Windows Server 2003 can be used to manage servers from another location using a Web browser. The Web Interface for Remote Administration tool is not supported for domain controllers. It is installed on Windows Server 2003 Web Edition by default. Before you can use the Web Interface for Remote Administration tool, you first have to install Web Interface for Remote Administration on your servers, and configure them correctly. After this, it is merely a matter of pointing the Web browser to your server's IP address, and you can then manage it from any location.
The requirements for accessing a server over the Internet are:
-
Web Interface for Remote Administration must be installed on the servers.
-
The server must have a valid external IP address. The external IP address is not needed if you are going to be accessing the server over the corporate network.
-
Port 8098 on the server must be used for communication over the Internet connection.
-
It is recommended to use Internet Explorer version 6.0 or later for remote administration.
How to install Web Interface for Remote Administration on your servers
-
Open Control Panel, and double-click Add Or Remove Programs.
-
Click Add/Remove Windows Components to open the Windows Components Wizard.
-
In the Windows Components Wizard, select Application Server and then click Details.
-
In the Application Server dialog box, select Internet Information Services (IIS) and then click Details.
-
In the Internet Information Services (IIS) dialog box, select World Wide Web Service and then click Details.
-
In the World Wide Web Service dialog box, click the Remote Administration (HTML) checkbox. Click OK.
-
Click OK in the Internet Information Services (IIS) dialog box.
-
Click OK in the Application Server dialog box.
-
Click Next in the Windows Components Wizard to start the installation
-
When prompted, insert the Windows Server 2003 installation CD.
-
When the installation has completed, click Finish.
How to access and administer a server using the Web Interface for Remote Administration tool
-
Open Internet Explorer.
-
Browse to https://Servername:8098
-
After the connection is established, you are displayed with a Welcome page.
-
Using the Web interface, you can perform a few common administration tasks, including administering network settings and local user accounts.
Using Remote Desktop For Administration to Remotely Manage Computers
Remote Desktop For Administration tool can be used to remotely manage servers running Windows 2000 or Windows Server 2003. It allows you to manage servers from any location, without actually affecting server performance, and with no additional licensing requirements. Two simultaneous remote administration sessions are supported. The Terminal Services service enables Remote Desktop For Administration. The Terminal Services service is installed on Windows Server 2003 by default. It is also preconfigured to support Remote Desktop For Administration.
Remote Desktop for Administration has to be enabled on each end of the connection before you can use. Remote Desktop for Administration is enabled in the System Properties on the server.
To enable Remote Desktop for Administration,
-
Click Start, Control Panel, and then double-click System.
-
When the System Properties dialog box opens, click the Remote tab.
-
Select the Allow users to connect remotely to this computer checkbox. Members of the local Administrators group are now able connect.
-
If you want to specify additional users to connect remotely to the computer, click the Select Remote Users button.
-
In the Remote Desktop Users dialog box, enter the names of the users who should be able to connect to the computer.
-
Click OK.
The next step in enabling remote administration using Remote Desktop For Administration connections, is to configure the Remote Desktop Connection for remote administration. Remote Desktop Connection must be configured on the workstations or servers which you are going to be used to manage the other servers.
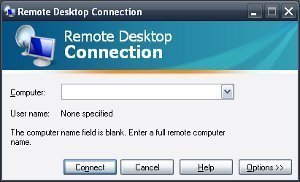
To open Remote Desktop Connection,
-
Click Start, Programs, Accessories, Communications, and then click Remote Desktop Connection.
-
In the Remote Desktop Connection dialog box, click Options to reveal the tabs on which you can configure settings.
-
The tabs available on the Remote Desktop Connection dialog box are listed below:
-
General tab, Display tab, Local Resources tab, Programs tab, and Experience tab
-
You can configure the settings listed below on the General tab:
-
You enter the name or the IP address of the server that you want to connect to, and manage on the General tab.
-
You can also specify the local or domain account credentials which you want used for authentication.
You can configure the settings listed below on the Display tab:
-
You can configure display settings that control the size of the Remote Desktop Connection window, color and depth on the Display tab.
-
You can also set whether the connection bar should be displayed when in full screen mode.
You can configure the settings listed below on the Local Resources tab:
-
The options which can be selected in the Remote Computer Sound area of the tab are:
-
Bring to this computer: Selecting this option redirects audio output from the server to the client.
-
Do not play: Audio is disabled at each end of the connection.
-
Leave at remote computer: Selecting this option results in audio output being played back at the server.
-
-
The options which can be selected in the Keyboard area of the Local Resources tab are:
-
On the local computer: Choose this option to switch applications on the local computer.
-
On the remote computer: Choose this option to switch applications on the remote computer.
-
In full screen mode only: When selected, the remote system carries out keystroke combinations when the remote session has encompassed the whole display on the client workstation.
-
-
The options which can be selected in the Local Devices are of the Local Resources tab allow you to specify what local devices should be connected to when you are logged on to the remote computer. You can select between the following
-
Disk Drives
-
Printers
-
Serial Ports
-
You can configure the settings listed below on the Programs tab. These settings specify the programs that should execute when a Remote Desktop for Administration session starts.
-
Enable the Start the following program on connection checkbox, and then enter the program's file name and path in the Program path and file name box.
-
Enter the working directory for the program in the Start in the following folder box.
You can configure the settings listed below on the Experience tab. These settings are specific to improving the performance of the Remote Desktop for Administration connection.
-
You can choose to allow the features listed below on the remote computer:
-
Desktop background
-
Show window contents while dragging
-
Menu fading and sliding
-
Themes
-
Bitmap caching
-
The Remote Desktop Connection client is installed by default on Windows XP workstations and Windows 2003 Servers. Remote Desktop Connection client is supported for Windows 95, Windows 98, Windows Me, Windows NT, Windows 2000, Windows XP Professional and Windows Server 2003.
How to use Remote Desktop Connection to remotely manage a server,
-
Click Start, All Programs, Accessories, Communications, and then click Remote Desktop Connection.
-
The Computer box displays the name of the computer that you last connected to.
-
Choose the computer which you want to connect to, using the Computer drop down box.
-
Click Connect.
How to optimize a connection to a remote server on a slow, congested network
-
Click Start, Programs, Accessories, Communications, and then click Remote Desktop Connection.
-
In the Remote Desktop Connection dialog box, click Options to reveal the tabs on which you can configure settings.
-
Click the Experience tab.
-
Select the Custom option from the Choose your connection speed to optimize performance box.
-
Clear the Themes checkbox.
-
Ensure that the Reconnect if connection is dropped checkbox is enabled.
-
Click OK.
How to add the Remote Desktops Snap-in to a MMC, and use it for remote administration
The Remote Desktops MMC snap-in can be used to manage Remote Desktop sessions with Terminal Servers and Windows Server 2003 servers. Once you have added the Remote Desktops snap-in to a MMC, you can use it to establish Terminal Services connections to Windows 2003 servers and Terminal Servers.
To add the Remote Desktops snap-in to a MMC,
-
Click Start, Run, enter mmc in the dialog box, and click OK.
-
Click Add/Remove Snap-in from the File menu.
-
When the Add/Remove Snap-In dialog box opens, click Add.
-
When the Add Standalone Snap-in dialog box opens, select Remote Desktops and then click Add.
-
Click Close in the Add Standalone Snap-In dialog box
-
Click OK in the Add/Remove Snap-In dialog box.
-
The Remote Desktops snap-in which you selected on the Add Standalone Snap-in dialog box now appears in the console tree.
-
Click Save from the File menu to save the MMC.
-
Enter a name for the MMC in the File Name box.
-
Click Save.
-
The saved console can now be accessed via the Administrative Tools Menu.
How to configure a connection in the Remote Desktops snap-in
-
After you have added the Remote Desktops snap-in to a MMC, right-click the Remote Desktops node in the console tree, and click Add New Connection from the shortcut menu.
-
Enter the IP address, fully qualified domain name (FQDN), or NetBIOS name of the server to which you want to connect in the Server Name Or IP Address text box.
-
In the Connection Name text box, enter a name for the connection.
-
Enable the Connect To Console checkbox if you want to connect to the console of the server.
-
Enter your name in the User Name text box, enter your password in the Password textbox, and enter the domain name in the Domain text box.
-
Enable the Save Password checkbox to save the password that you have entered.
-
Click OK to save the connection.
Using Remote Assistance for Remote Management
The Remote Assistance feature is a dependant on the Terminal Services service, and is automatically installed when Windows Server 2003 is installed. Remote Assistance enables a user (novice) at one computer to request assistance via Windows Messenger or e-mail from a user (expert) at another computer on the local network, or over the Internet. Once the expert receives a request for remote assistance, the expert can remotely connect to the computer of the novice. This means, that when the remote assistance session is established, the novice and the expert can simultaneously control the computer. The Remote Assistance feature is extremely useful if you want to troubleshoot user problems, or connect to a remote computer to change configuration settings or install new software. You have to though enable and configure Remote Assistance first.
In order for a computer to receive remote assistance, the computer must be running Windows XP or Windows Server 2003. The computer must also be enabled to use Remote Assistance.
To enable a computer to use Remote Assistance, use one of the processes listed below:
-
Control Panel: Use the steps listed below to enable a computer to use Remote Assistance
-
Open the System Properties dialog box in Control Panel.
-
Click the Remote tab.
-
Click the Allow Remote Assistance invitations to be sent from this computer checkbox.
-
Click the Advanced button.
-
When the Remote Assistance Settings dialog box opens, click the Allow this computer to be controlled remotely checkbox.
-
Click OK.
-
-
Group Policy: To enable Remote Assistance using Group Policy,
-
Open the GPO linked to the site, or domain that contains the computer using the Group Policy Object Editor console.
-
Expand the Computer Configuration node, Administrative Templates node, System node, and click the Remote Assistance node.
-
Double-click the Solicited Remote Assistance policy.
-
When the Solicited Remote Assistance Properties dialog box opens, select Enabled.
-
Use the settings in the Permit remote control of this computer section of the dialog box to specify whether a client on a remote workstation computer is able to control the server.
-
Click OK
-
A user can request remote assistance using one of the methods listed below:
-
Windows Messenger
-
E-mail
-
Save the request to a file
The Windows Messenger tool is a chat application which you can download and install, for free.
To download the Windows Messenger tool,
-
Open the Help and Support Center
-
Click the Download Windows Messenger link.
-
When a Web page appears, click Download Now.
-
On the Save As dialog box, click Open
-
After the download is completed, click Yes in the Security Warning dialog box.
-
Click Yes to accept the license agreement, and start the installation of the Windows Messenger tool.
-
After the installation, the Windows Messenger window opens, giving you the option to sign in.
-
Click the Click here to sign in link.
-
This starts the .NET Passport Wizard.
-
Click Next on the initial screen of the wizard.
-
Click the No. I would like to open an MSN Hotmail e-mail account option, and click Next.
-
Click the I Agree button
-
Click Continue to open the Associate your .NET Passport with your Windows user account? Page.
-
Click Next. Click Finish.
To send a remote assistance request using the Windows Messenger Tool, you have to first add contacts or users from whom you will be requesting remote assistance.
-
Click the Add a Contact link in the Windows Messenger window.
-
To search for a contact, click the Search for a contact option. Click Next.
-
Enter the criteria which should be used to search for the contact. Click Next.
-
When the search results are displayed, choose the contact you wish to add. Click Next.
-
Click Finish.
How to request remote assistance using e-mail
-
Open the Help and Support Center.
-
Click Remote Assistance located under the Support area.
-
Click the Invite someone to help you link.
-
Enter the name of the expert which you want to request remote assistance from in the Type your assistant's first name: text box. Click Continue.
-
In the Set the invitation to expire section, specify the validity period for the invitation.
-
If you want the expert to provide a password to access the invitation, leave the Require the recipient to use a password checkbox enabled.
-
Enter the password in the Type password and Confirm password text boxes.
-
Click the Create Email Invitation button.
How to initiate Remote Assistance from your computer to a user's computer
-
Open the Help and Support Center
-
Click Tools and click Help And Support Center Tools
-
Click Offer Remote Assistance
-
Enter the name or IP address of the computer that you want to offer remote assistance to.
-
Click Connect
-
If prompted, select a user session.
-
Click Start Remote Assistance.
-
At this point, a message appears on the user's desktop, indicating that an administrator wants to initiate a Remote Assistance session.
-
Once the user accepts remote assistance, the Remote Assistance session is established.
<! >

Server Management
Remote server management tool can be a very useful tool when properly use and integrated into your server system. Its very convenient and can be navigated easily.