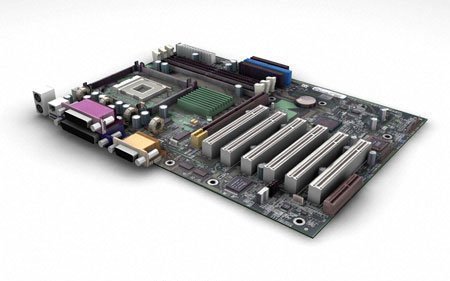
Motherboards hold all the pieces that make up your computer. It supplies all the wiring and connections needed to make your computer run. However, you may feel that need to upgrade or replace your motherboard.
Before anything can be done, you need to be absolutely sure that you have to upgrade your motherboard. As a stand-alone part, motherboards are probably the part that would least likely need an upgrade. Some reasons for having to upgrade would be:
- Not enough space for an adequate amount of RAM
- No slot for an adequate graphics card
- Damage to the actual motherboard
You then need to decide whether you want to keep the current parts of your computer, or buy completely new ones along with your motherboard.
Keeping the Same Parts
If you want to keep the same parts in you computer after purchasing a new motherboard, you need to start by looking at the parts you already have. In this way, you need to look for a motherboard that is compatible with your existing computer parts. This is essential because you do not want to buy a motherboard that is not compatible with any of the parts you already have.
You may not know what parts your computer consists of. To find this out:
- Right click on 'My Computer'
- Go to Properties
- Go under Hardware
- Click Device Manager
You can now see all the parts that your computer has. Remember to write these down for future reference.
After doing this, you can start looking for a motherboard. Sites such as Newegg are a great way to compare and contrast different models.
When looking for a motherboard, make sure that it has the following:
- Enough RAM slots
- A PCI slot that is compatible with your graphics card
- A CPU Socket that is compatible with your CPU
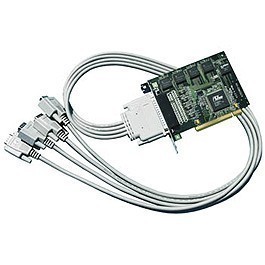
- Enough USB drives to comfortably fit everything you may want to plug in
- Optional: Onboard sound to save some money and have a spare PCI slot
Once you have chosen a motherboard, be sure to double check that all existing parts fit.
Buying New Parts
If you want to completely upgrade your PC and buy new components along with you motherboard, you are effectively building a new computer.
All the parts that you choose must be based from your motherboard. Each part must be compatible with the motherboard you choose in order for your computer to run.
When buying a brand new motherboard, look for:
- Enough RAM slots
- A PCI Express slot for a good graphics card
- A widely accepted CPU slot to increase your CPU model options
- Optional: Onboard sound
Once you have purchased your motherboard, you are ready to install it.
Taking out the Motherboard
You will need just a screwdriver for the entire process
- First, disconnect all the wires behind your computer
- Start by taking out the largest wire that connects the power supply to the motherboard
- Move onto the smaller wires that are used for processes such as LED, Power Switch and Reset Button
- Take the larger ones out next: the wires running from the read/write drive and hard drive.
- Open the case – you may need to use a screwdriver for this.
- 'Ground' yourself by touching the large metal bar across the computer towards the top. Static electricity can completely destroy parts. Doing this gets rid of the static electricity in your body.
- Start by taking off all the wires that are connected into the motherboard. You can move these wires to the side.
- The graphics card is located towards the bottom of the motherboard. There will most likely be a switch or latch where the graphics card extends to the back of the computer. Lift or switch this latch.
- Very gently, begin by pulling up the end of the graphics card is closest to the back of the computer. This side should lift up.
- There is a hook on the other end of the graphics card. Be aware of this when fully detaching the card. Lay the card to the side when you are done.
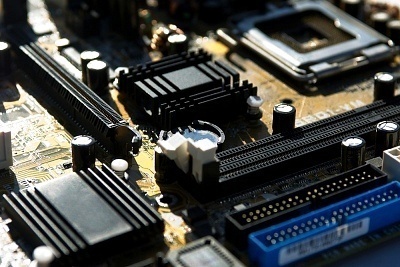
- You now have to take off the heat sink and fan located on the CPU.
- Detach the wire from the heat sink and fan from the motherboard.
- Depending on what model of CPU you have, you need to take off the heat sink and fan first. There should be a latch that you lift that will release both the heat sink and fan.
- You now need to take out the actual motherboard.
- There will be screw all around your motherboard. Unscrew these and you should be able to lift it up out of the computer relatively easy.
- Once you have the motherboard out, you need to take off the RAM and actual CPU.
- Lift the metal latch located above the CPU socket.
- Gently lift the CPU up and off the motherboard. You may need to move it from side to side a little to loosen it.
- On either side of the RAM will be some handles. Push these down and the RAM card should pop right out. Be careful to not use too much force.
Remember:
- No water or food anywhere near where you are working
- Never use force if something is not going right
Re-Attaching the New Motherboard
Once you have successfully taken out your old motherboard, you can now proceed to install the new one. The steps taken here are basically the same as detaching the motherboard, but in the opposite way.
- First, put the CPU onto the motherboard and close the metal latch.
- Open the handles on the RAM slots and push the RAM into it. There are corresponding holes on the RAM cards so make sure these are aligned.
- You should here a click with the RAM is attached properly.
- Take the motherboard and place it in the computer.
- Depending on the two types of motherboard you have, you may need to realign the 'legs' that the motherboard is screwed onto. In this case, take out the legs and screw them back in the corresponding shape to the larger holes on the motherboard.
- After doing this, screw in the motherboard.
- Plug the power supply into the motherboard.
- As before, you now need to replace the heat sink and fan on the motherboard. Place them onto the CPU and latch it in.
- Remember to plug the wire leading out of the fan into the motherboard for power.
- You now need to install your graphics card.
- Sliding in the end of the graphics card that has the hook first, slowly lower the other end until it fits nicely onto the motherboard. You may need to lift or switch a handle to secure it in place.
- You now have to reattach all the wires you took out.
- Start with the larger ones. Since you should not have removed the read/write drive and hard drive when taking out your motherboard, they should still be in place. Plug these into the respective slots.
- Now plug the rest of the wires in.
Remember:
In doubt, always refer to the motherboard manual.
Testing the new Motherboard
After installing your new motherboard, you are ready to test it out. Reconnect all the wires you had into their respective slots on the back panel.
Turn the computer on. If you hear a beep, that is the sound of the motherboard detecting the hard drive. This is perfectly normal.
Changing your motherboard should not result in any major changes to the software on your computer. Make sure that everything still runs smoothly.
Richard Shuttleworth
PS: I forgot to mention that I am just using a Dell mini tower or case, none of the original Dell components remain inside, I removed them all and replaced the original Dell mobo with an Asus P5L-MX, I want to upgrade to a better faster board, 64 bit and a much better chipset. I currently am using an Intel Core 2 processor and I will stick with that.
Regards: Rich
memenode
I haven’t been in the market for a motherboard for quite a while. That’s quite a complex decision to make when buying on your own. I suggest making a shortlist of features you need and then going through the ASUS motherboards in your price range and narrow it down to what fits all your requirements. Then pick something that strikes the best balance between price and performance for you.
For example if you want to keep using the Core 2 Duo CPU you’re probably limited to motherboards with an LGA 775 slot (or Socket M in case that’s what your CPU uses). That will narrow it down quite a bit (keep in mind this means you can’t upgrade to new i3, i5 or i7 CPUs). The size would be another factor to narrow it down.
It’s a pretty personal choice, depending on your needs and preferences so it’s hard to give you a straight recommendation, but maybe someone who’s in the market right now as well (unlike me) can recommend something directly.
Good luck.
Richard Shuttleworth
Hi, Richard here, I currently have an Asus P5L-MX mobo and I want to upgrade to another Asus board with 64 bit and a better chipset. I am also thinking about going with 8 gig of RAM. The problem is, my current mobo is in a small Dell case. I have to stick with the same dimensions as the P5L-MX, what would you recomment???
Regards: Richard