Modern Macs use the same underlying system architecture as Windows PCs. The only differences are in the ways Apple integrates these components and how they design the machine as a whole. This means that Macs can run Windows natively just as all PCs can and Apple actually touts this fact as one of its upsides.
Install Windows without Erasing Mac OS X
Apple has provided an official and built-in method of setting up Windows on a Mac while still keeping Mac OS X called Boot Camp. It no longer supports Windows XP and Windows Vista, but can be used to install Windows 7.
Before starting be sure to meet the following conditions:
- Backup the data on the hard drive.
- Get a Windows install disk or a Windows ISO from Microsoft’s online store.
- Have at least 10 GB of free disk space available. The recommended amount is over 20GB, however, enough to still leave some free space for Mac OS X (ideally 10-20% of total disk space on a Mac partition) and 20GB for the Windows partition. If one has 160 GB total, this would amount to about 36-52GB of ideal free space being available, of which 16-31 GB would be left to Mac OS X and 20GB would be given to Windows.
If one runs into an issue where Boot Camp Assistant states that the “startup disk does not have enough space to be partitioned” and that one needs at least 10 GB of free space available even though there is already even more than that, it is possible that there is not enough free space in a single congruent piece on the hard drive, which can happen if the disk is fragmented due to having too little space available for an extended period of time.

In that case, open Disk Utility and try a disk repair and permissions repair. If it does not work, consider defragmenting the disk with a tool such as iDefrag. If nothing works or as an alternative solution, backup the entire drive and reinstall Mac OS X, which would format the disk clean. Hopefully this will not be an issue and Boot Camp Assistant will work immediately.
Once all the conditions are covered, one can launch Boot Camp Assistant. It can be found in the Applications > Utilities folder or via Spotlight. As the first screen of Boot Camp Assistant states that it will download the necessary support software, partition the hard drive to make space for a Windows partition and start the Windows installer.

1. Select Tasks for Boot Camp Assistant
The first step allows one to select which of these tasks Boot Camp Assistant should complete. One can create a Windows 7 install disk with a USB flash drive, download the support software to it, and install Windows 7.

If Windows 7 was purchased from Microsoft’s online store, one should have the right Windows 7 ISO and can keep the first task selected. Otherwise, skip it and use an existing Windows 7 install disk. Keep the other two options selected.
2. Download and save the Windows support software
The next step will ask where to download the Windows support software. One can choose to burn it to a CD or DVD or copy it to an external hard drive (which may include an USB flash drive as well). Select one’s preference and press continue. Note that if a USB flash drive is selected it will be formatted, so make sure to backup any data on it before using it with Boot Camp Assistant.

Having done that, press Continue. One will either be asked to put a blank disk in the DVD drive or select the location on the external drive that the support software should be saved to, depending on one’s selection on the previous screen. Once a blank disk is inserted or the destination location is set on an external drive, the Boot Camp Assistant will start downloading and saving the support software.
Once done, it will ask for one’s administrator account user name and password to install additional helper tools. If the Mac only has one user, then he/she should only need his/her own username and password.
3. Create a Windows partition
Boot Camp Assistant will now display a graphical representation of what the internal hard drive will look like once a Windows partition is created. By default, it might select 20GB for Windows and the rest for Mac OS X, but one can drag the slider between them to customize the sizes or click the “Divide Equally” button to split the drive in two equal sizes (if there is enough free space).

It is recommended to leave it at 20GB or add more depending on how much one can spare and what one will use Windows for. If it will be used for gaming, for example, one might need more since many modern games tend to be pretty big.
Once the hard drive division is done, just click the Install button.
4. Install Windows
Insert the Windows install disk or USB Flash drive into the Mac. If not, the Mac will ask that the disk be inserted once Install is clicked. Once this is done, it will proceed with the install procedure, starting with partitioning the hard drive as configured above.
During this process, the Mac may reboot a few times. Press a key to boot from a DVD when asked, which will cause the standard Windows install procedure to be displayed. If Windows install asks you to select a hard drive where to install Windows be extra careful to select the one with “BOOTCAMP” in the name. Otherwise you will install over Mac OS X. Just make sure “BOOTCAMP” is selected.

During this process you can also enter other standard information necessary for a normal Windows 7 install, like your desired Windows username and password, time zone and license key.
Once Windows install is complete you will boot into your brand new Windows set up.
5. Install Windows support software
To make Windows function properly on your Mac (and improve from its initial post-install look and feel) you still need to install the Windows support software you downloaded with Boot Camp Assistant.
Insert the disk or USB flash drive you downloaded Windows support software to, and navigate to the setup.exe file. This will launch a Windows version of the Boot Camp Assistant that will install all the drivers and utilities necessary.
Said utilities will allow you to select which operating system, Mac OS X or Windows, do you want your Mac to boot into automatically (your Startup Disk). They also allow configuring other options specific to your Mac including options for your trackpad, keyboard, brightness, and remote.
That’s it. Now you have both Windows and Mac OS X running smoothly on your Mac. When you reboot you can press the Option key (alt) to get a choice of startup disks to boot from. Choose “Macintosh HD” to boot into Mac OS X or “Windows” to boot into Windows.
If you need any more information about this consult Apple’s Boot Camp support pages.
Installing Windows Over Mac OS X
What if you want to ditch Mac OS X from your Mac and install only Windows? You can do that too, and it may be even easier. The process in this case would look a lot more like installing Windows on any other computer.
First things first you would need to make sure to back up all important data on your Mac. If unsure, just make a complete back up of your entire hard drive. This way you also have an option to get back where you started if you change your mind about running Windows on your Mac exclusively.
When you’re done with the backup, you should use Boot Camp Assistant to download the Windows support software, and create a Windows install disk if you don’t have one already, but have an official Windows 7 ISO from Microsoft’s online store.
In the Select Tasks screen of the Boot Camp Assistant you would only select these two tasks, or just the one to download support software, but deselect the “Install Windows” task because it is meant to partition your internal hard disk and keep Mac OS X on it.
When you have your backups, Windows install disk, and support software disk you can boot your Mac from the Windows install disk and proceed with the normal install process. You would select your entire internal hard drive to format, and install Windows on.
Once the install is complete and you’re in your new Windows environment, insert the support software disk you made with the Boot Camp Assistant earlier, launch setup.exe, and install the support software to make your Mac work properly with Windows.
Virtualization – Install Windows Within Mac OS X
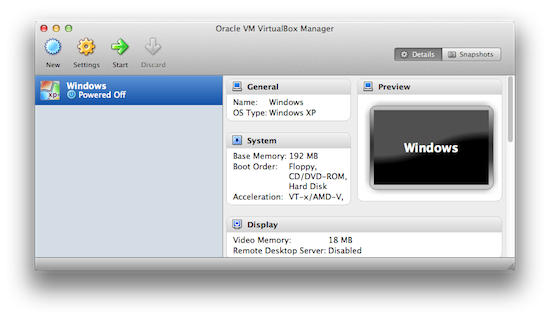
One way to install Windows on your Mac is to install it within Mac OS X itself. This would involve setting up a virtual machine with software such as VirtualBox, Parallels Desktop or VMWare Fusion, and installing Windows in it. In this case Windows wouldn’t have full access to your Mac hardware, or all of its resources, but it is a good way to go if you just need to run a few Windows programs on your Mac, and don’t really need a full blown installation.
We have a more complete guide about virtualizing Windows using free Virtualbox software as part of our article about running Windows programs on a Mac.
Video Guides
You can find a number of video guides online showing you how to install Windows on a Mac. We selected the following one as it shows the whole process, including Windows installation, and is fairly easy to follow.

A. Tatum Jr
Nice idea. Something I wouldn’t have thought about especially since most
Mac people I know say they don’t like Windows.