Publishing Content using WebDAV
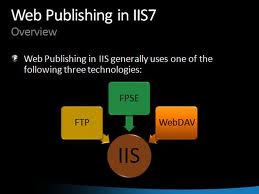
You can use Web Distributed Authoring and Versioning (WebDAV) to manage and publish content such as HTML files, ASP pages, scripts and executables, to IIS. You can use WebDAV to create and modify web content on Internet servers. WebDAV utilizes the port 80. This is the default used by HTTP. By default, WebDAV is not installed, nor enabled in IIS 6.
How to install WebDAV
-
Click Start, Control Panel, and click Add/Remove Programs.
-
Click Add/Remove Windows Components in the Add Or Remove Programs dialog box.
-
Click Application Server in the Windows Components dialog box, and then click the Details button.
-
The Application Server dialog box appears next.
-
Click IIS and then select the Details button.
-
Click the WWW Publishing Service, and then click WebDAV Publishing
- Click OK
How to enable WebDAV
-
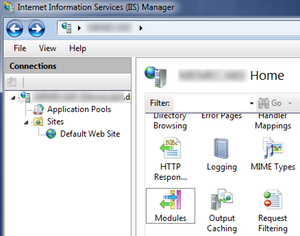
Open the IIS Manager.
-
Select the Web Service Extensions (WSE) node in the console tree
- Right-click WebDAV in the detail pane, and click Allow to enable WebDAV for all websites and virtual directories on the IIS server.

How to enable WebDAV Clients
Before you can use WebDAV for publishing, you first have to enable your client machines to support WebDAV. To do this,
-
Open the Services console under the Administrative Tools. Menu.
-
Locate the WebClient service.
-
Double-click the WebClient service to open its Properties window.
-
Verify that the Startup Type setting is set to Automatic.
-
Click Apply.
- Click Start to initiate the WebClient service on the client
How to configure WebDAV
The primary steps in configuring WebDAV are:
-
Create a WebDAV virtual directory: To use WebDAV to publish content to IIS, you have to create a WebDAV virtual directory. To do this,
-
Open the IIS Manager
-
Right-click the Default Web Site, and select New, and then Virtual Directory.
-
Follow the prompts of the New Virtual Directory Wizard to create the WebDAV virtual directory.
-
- Configure NTFS permissions: The NTFS permissions which you configure control whether users are able to use WebDAV.
To configure NTFS permissions for the WebDAV virtual directory,
-
-
Open the IIS Manager
-
Right-click the WebDAV virtual directory and select Permissions. The default permissions for users are
-
Read, users can read the file’s content
-
Read & Execute, users can read the file’s content and execute scripts
-
List Folder Contents, users are view the contents of the WebDAV directory.
-
-
The special permissions assigned to users are:
-
-
-
Create Files/Write Data
-
Create Folders/Append Data
-
-
-
Configure Web permissions: The Web permissions which you configure have to enable clients to perform the following tasks:
-
Publish content to IIS.
-
Manage various types of Web content
-
To configure Web permissions for the WebDAV virtual directory,
-
-
Open the IIS Manager
-
Right-click the WebDAV virtual directory and select Properties from the shortcut menu.
-
Click the Virtual Directory tab. The Web permissions and other configuration settings which you can configure are:
-
Script Source Access, if the Write permission is enabled as well, users are able to edit ASP pages and files.
-
Read, enables users to read files, if the NTFS permissions also enables this permission.
-
Write, users can write files to the directory, if the NTFS permissions also enable this permission.
-
Directory Browsing, users can view files in the directory, if the NTFS permissions also enables this permission.
-
Index This Resource, if the Indexing service is enabled, users are able to search the files in the directory.
-
-
Publishing Content using FPSE
You can use the FrontPage to publish Web content to IIS, and to manage Web content. IIS 6 includes FrontPage Server Extensions 2002 (FPSE 2002), to provide the following:
-
Enable client computers to connect with the Web server through FrontPage
- Enable client computers to create, edit, and delete Web content.
How to install FPSE
-
Click Start, Control Panel, and click Add/Remove Programs.
-
Click Add/Remove Windows Components in the Add Or Remove Programs dialog box.
-
Click Application Server in the Windows Components dialog box, and then click the Details button.
-
The Application Server dialog box appears next.
-
Click IIS and then select the Details button.
-
Click FrontPage 2002 Server Extensions.
- Click OK
How to enable FPSE
-
Open the IIS Manager.
-
Select the Web Service Extensions (WSE) node in the console tree
- Right-click FrontPage Server Extensions 2002 in the detail pane, and click Allow to enable FPSE for websites and virtual directories on the IIS server.
How to configure additional websites to support for FrontPage
-
Open the IIS Manger
-
Locate and right-click the website, select All Tasks from the shortcut menu, and then select Configure Server Extensions 2002.
-
When the tool for managing FPSE opens, click the Submit button
- On the Server Administration page, you can configure the global FPSE settings for the websites on your server.
Configuring Content Expiration
The IIS 6 content expiration feature enables you to specify when content should expire. For content that has expired, the page is requested again, and not retrieved from the cache. Content expiration can be configured at the site level, virtual directory level, or file level.
To configure content expiration for the Default Web Site,
-
Open the IIS Manager
-
In the console tree, right-click Default Web Site, and select Properties from the shortcut menu.
-
Click the HTTP Headers tab.
-
Click the Enable Content Expiration checkbox.
-
The options that you can select with regard to content expiration are:
-
Expire Immediately
-
Expire After, specify the time duration after which content should expire.
-
Expire On, specify the date and time when content should expire
-
- Click OK.
Configuring Redirection for Client Requests
The methods in which you can redirect client requests for files in a directory on the Web server are listed below:
-
You can redirect client requests to a different directory but on the identical site to which the content is moved.
-
You can redirect client requests to a different website.
-
You can redirect client requests to a specific URL on a site on the Internet
- You can redirect client requests to a particular file in a directory on the site
How to configure redirection for a website or virtual directory
-
Open the IIS Manager
-
Navigate to either the properties window for the particular site or virtual directory.
-
Select either the Home Directory tab or Virtual Directory tab.
-
On the Home Directory tab, click the A Redirection To A URL option.
-
The Home Directory tab displays the following options for redirecting client requests:
-
The Exact URL Entered Above
-
A Directory Below URL Entered
-
A Permanent Redirection for This Resource
-
- Click OK


Follow Us!