GIMP (GNU Image Manipulation Program) is an image editing software that serves as a free alternative to Adobe Photoshop. While Photoshop is a household name, GIMP is equally popular in the digital art industry. This is because GIMP offers a wide variety of features that resemble Photoshop features in almost every way. GIMP is an ongoing project that is capable of performing all of the same tasks that Photoshop can and includes several features that Photoshop does not have. Educational facilities, artists, businesses, web designers, and home users who do not want to have to pay for a high quality image editing software use GIMP.
How to X-Ray in GIMP
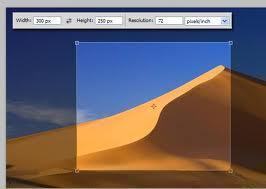
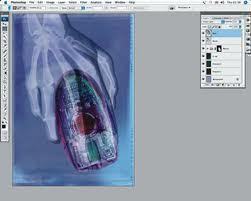
One of GIMP’s most unpopular features that rivals Photoshop is its ability to apply an X-Ray feature to any image. While clothing and objects in images must be of a bright, thin material, GIMP is able to increase the item’s transparency so that users can actually see through the object that they are looking at. The X-Ray feature can be applied in GIMP by opening the desired image and using the scissors tool to select an object (this can be done by clicking on areas around the object and then clicking the center of the object to edit it). The user then finds the Colors tab on the toolbar and selects Levels. An interface box should appear that allows the user to move sliders back and forth to achieve transparency within the object.
This will allow the user to apply a basic X-ray to an image, but further transparency can be achieved by clicking on Colors and selecting Hue/Saturation. The user can adjust these sliders to make the image clearer. More adjustments can be made in the Brightness/Contrast window in the Colors tab. The user can then make manual adjustments by selecting the Dodge/Burn option and selecting an appropriately sized brush. The Dodge option allows the user to lighten an image while the Burn option allows the user to darken it. The user can go to “Undo History,” select the Scissors, and copy and paste it into the bottom button marked “Select None.” This allows the user to drag the original section over the modified section. The airbrush can then be used (high brush scale/low pressure) to cover the selected area in bright yellow. The user can now select the Layer tab on the toolbar, Transparency, and “Color to Alpha” and choose the same shade of yellow as before (FFF000 works best). The Hues/Saturation option on the Colors tab will now create a much more realistic image when the saturation is set to zero.
Other GIMP Features
While GIMP is able to create an X-Ray of an image, it is also able to perform many more tasks. GIMP includes a completely customizable user interface, advanced image enhancement tools, and compatibility with a number of operating systems, platforms, and hardware devices. Each of these features are listed in detail below.
Customizable User Interface
GIMP has a completely customizable user interface that far exceeds anything that Photoshop is capable of. Users can not only choose which windows and tabs are pulled up, but can also assign various functions to specific keyboard shortcuts and even create customized menus.
Quality Enhancement
GIMP has advanced image enhancement tools such as red eye removal, cropping, brightness, hue, saturation, and color options. The user can also use any of GIMP’s object selection tools to focus on specific aspects of images and modify them to reach a preferred level of quality.
Compatibility
GIMP can run on Windows, Linux, Unix, Mac OS, and several other operating systems. The software is available in multiple languages that include English, Spanish, German, and French. GIMP is also able to open and modify a wide range of image file formats including TIFF, JPEG, GIF, PNG, PSD, TGA, BMP, XWD, XPM, PIX, CEL, MNG, PPM, and PCX.

Follow Us!