Home     Blog

How to Put One Picture into Another in Photoshop

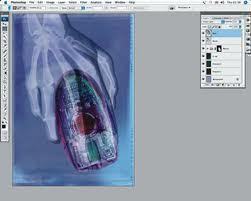
Photoshop is a popular graphics design software that Adobe provides. It allows users to create a wide variety of images from scratch or modify an existing image with a large assortment of tools and features. The most common technique used in Photoshop is putting one picture into another, something that other graphics editing programs cannot do correctly.


Cropping

The first step for putting one picture into another is cropping. Cropping refers to the ability to select a specific item within an image so that it can be edited without modifying the rest of the picture. Users can crop an item in Photoshop by using either the standard Crop tool or the Lasso tool, but the Lasso tool allows users to outline an image with greater accuracy in order to pull an item from an image without also cropping unnecessary or unwanted items. How to Put One Picture into Another in Photoshop


Copying/Pasting

After the user has cropped an item within an image, he/she can simply copy and paste it into another image. The copy and paste tools can be found by right clicking anywhere within the image or via their keyboard shortcuts, Ctrl + C and Ctrl + V respectively.


Dragging/Resizing

Once the user has pasted his/her image into another picture, he/she can drag the image to its appropriate position and resize it by dragging the arrows around it outward. The user can also rotate the image if necessary by using the Image Rotation tools found in the Image menu.


Pixelation

Once the image has been cropped, pasted, positioned, resized, and rotated to the user’s liking, he/she must make the image clearer by removing any pixelation in the final picture. Pixelation refers to colors that have blended together and spots within the image that appear to be blurrier than they should be. This can be corrected by using the Magic Eraser tool or the Dodge tool, depending on whether the pixelation is in a blank area of the image or directly on an item that cannot be erased.

VN:F [1.9.17_1161]
Rating: 0.0/10 (0 votes cast)
Follow Will.Spencer on

Leave a Reply

Related Posts

  • How to Create a Glass Picture Frame in PhotoShop

    This tutorial will help you create a glass-looking picture frame in Photoshop. First, draw a gradient in the background layer: Next, create a red rectangular box: Then apply this effect to the layer: This will be the result: Then duplicate the layer and flip it vertically to make it look like this: Then draw this [...]...


  • Boundary Around a Picture

    STEP 1: First open an image in Photoshop. STEP 2: Select an area in the picture. STEP 3: Now Invert the selection by pressing “ctrl + shift + I” keys STEP 4: Now press the “Edit in Quick mask Mode” as shown in the figure or just press key “Q”. STEP 5: We add a [...]...


  • Picture Quality

    Picture quality is a general term used by the viewer to rate the inherent quality of the image. It is mainly subjective, meaning that each viewer rates the picture quality differently. Some people may think that an image is high enough quality, but you may have an individual with higher standards that may say the [...]...


  • Picture Sharpness

    Picture sharpness can be summed up by being defined as the fine details found in an image. Images can be analog, such as a photograph or on a standard TV screen. They can also be digital made out of pixels or small bits of information as in HDTV (high definition TV) or digital photo images. [...]...


  • Digital Picture Frame

    The best way of remembering the good times is by taking photographs and preserving them. One will find numerous photo frames adorning the mantle piece in most houses with pictures of family members and friends alike. These are a way of cherishing happy moments or special times and one can take pleasure in going through [...]...