An Overview of Access Control
Allowing users and computers unlimited access to system resources and network resources can ultimately compromise the security and stability of an organization. Even though users and computers need to access network and system resources to perform certain tasks, the access that they require should be limited to those necessary to perform these tasks. Access control has since evolved from being access oriented with Windows 2000 and earlier to being control oriented with Windows Server 2003. With the launch of Windows Server 2003, Microsoft tightened its default security settings by granting the Everyone group read and execute permission on NTFS files and folders, and limiting the Everyone group to read permissions on shared files and folders. This group in Windows 2000 and earlier had full control on all newly created files or folders.
Access control deals with determining whether a user that has been authenticated can perform particular activities. When an attempt is made to access objects, access control determines whether the object can be accessed. Objects include Active Directory objects, files and folders, shared folders, network services, printers, registry keys and values, Windows Management Interface objects, and Terminal Services connections. Windows Server 2003 simplifies access control management by using a standard model which utilizes access control lists (ACLs), inherited permissions, and standard and special permissions, for all the different types of objects.
Before exploring access control any further, you should familiarize yourself with the following terms:
-
Security principal: Any user, group, computer or service can be a security principal. A security principal has accounts. Local accounts are maintained by the Local Security Accounts Manager (SAM) on the computer. Accounts in a Windows 2000 Server, or Windows Server 2003 domain are managed by Active Directory. Accounts in a Windows NT 4.0 domain are managed by the SAM database. This database resides on the primary domain controller (PDC).
-
Security identifier (SID): When accounts are created, they receive a unique SID. A SID therefore identifies a user, group, computer or service in the organization. What this means is that security principals are identified via SIDS and not their associated names.
-
Security descriptor: A security descriptor includes the security information of an object, and utilizes the SID of the object to identify its owner. When an object has permissions set up for it, the security descriptor includes the discretionary access control list (DACL) and the SIDs of the users and groups which are either allowed or denied access to the secured object.
-
Security context: This is information that indicates the identity of a security principle and its permitted activities on the computer. The security subsystem utilizes the security context to ascertain what actions can be performed to the objects on a computer.
-
Security groups: These are groups utilized to manage users and domain objects. Through security groups, you can configure security permissions to users or members of a particular group.
-
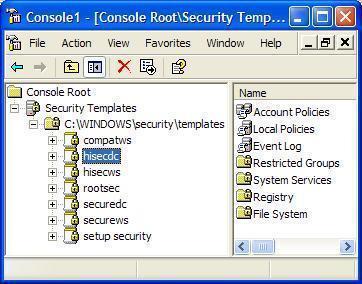
Security Settings: These are security configuration settings which can be applied to computers locally or through the Security Settings extension of Group Policy.
-
Access token: Access tokens contain the following:
-
The SID for a security principal
-
The SIDs for the groups that the security principal is a member of
-
A list of a rights of the security principle on the local computer
An Access token supply the security context for the actions of the security principle on the computer; and it supply the security context for application threads utilized by the security principle.
-
-
Object: An object refers to a resource that can be utilized by a process or program. Objects are files, printers, registry keys, ActiveDirectory objects, sessions, access tokens, and processes and threads
-
Inheritance: This is the means by which access control information is moved via an associated tree of objects, and the child objects obtain the access control information of its parent object. This typically happens with files inheriting access control information from its parent folder.
-
Access control lists (ACLs): ACLs contain access control entries (ACEs) that describe the permissions associated with objects and object properties. For a security principal, an ACE defines the rights which are denied, allowed and audited for a particular security principal. Access control lists basically deal with the following layers of security:
-
NTFS permissions: NTFS permissions are applied to files and folders. This is the more favourable permissions because it can support intricate file and folder structures.
-
Share permissions: Share permissions basically apply to users that are connecting over the network to a network resource. Share permissions do not support inheritance, and are not as flexible as NTFS permissions.
-
-
Owner: The owner of an object can deny or allow access to the particular object that it is the owner of. The owner of an object can also enable a different security principal to take ownership of the ownership.
-
Permissions: Permissions are assigned to Active Directory objects, registry objects, and files and folders. Permissions basically specify the type of access given to a user, group, or computer, and can be applied to any user, group or computer. Permissions can also be applied to special identities such as the creator owner, interactive group, local system, network group, and service group. Because permissions are inherited, you can configure child objects to inherit its parent object permissions.
-
Rights: Rights enable a user to carry out certain activities such as restarting the computer.
Planning for Effective Access Control
Because the management of security groups, ACLs, and security settings needs careful planning, you need to create an access control plan that could assist in preventing standard security problems from occurring. Standard security problems you want to prevent from occurring are:
-
Inefficiently protecting network resources
-
Assigning users too much rights and permissions, or too little rights and permissions to perform their daily tasks. You should strive to assign users, services, and computers with the least number of privileges necessary to perform the tasks they need to.
-
Continuously performing ad hoc security configurations to correct security settings.
A good access control plan should include the following components or tasks.
-
Security goals: This component of the security plan should identify the resources and processes that you want to control access to.
-
Security risks: You should identify the security vulnerabilities of the organization and identify security loopholes. The following elements should be included when analyzing security risks:
-
Physical data loss
-
Data corruption
-
Unauthorized data access and data modification
-
Incorrectly configured permissions that could lead to security breaches.
-
-
Security strategies: This component should outline general security strategies that deals with all possible threats identified as security risks.
-
Security group descriptions: You should identify the permissions which you want to apply to different users, user groups, and resources. From this information, you should define security groups so that you can implement permissions effectively.
-
Security policy: Determine the configuration settings you want to implement for the Security Settings of Group Policy if you are using Active Directory.
-
Information security stratgies: This component should detail the manner in which you plan to implement information security solutions like encrypting file system (EFS), if applicable for your environment.
-
Administrative policies: This component involves detailing those policies for delegating administrative tasks, and should also include all your auditing practices.
Access Control Lists (ACLs) and Access Control Entries (ACEs)
An ACL controls access to resources. The two types of ACLs are:
-
Discretionary Access Control Lists (DACL): DACLs identify the users and groups which are allowed or denied to access a particular resource.
-
System Access Control Lists (SACLs): SACLs control how access is audited and specify the events which are audited for a user or group
Each ACL includes a number of access control entries (ACEs). An ACE holds the following information:
-
The security ID (SID) for a user or group
-
The special permissions which detail access rights
-
Inheritance information
-
Information on whether the particular ACE is an Allow ACE or Deny ACE
The process detailed below explains the manner in which the DACL is set when new objects are created:
-
The DACL of a new object is the DACL from the security descriptor when the object is created. Inheritable ACEs from the parent object is included in the DACL.
-
When there is no defined security descriptor, the DACL of the new object is created from the inheritable ACEs in the DACL of the parent object.
-
When the parent object does not include any inheritable ACEs, the Object Manager is queried for a default DACL.
-
When the Object Manager returns no default DACL, the access token of the user is checked for a default DACL.
-
When the access token of the user has no default DACL, the new object includes no DACL. This means that the Everyone group has unrestricted access to the new object.
Using the User/ACL method to control access to resources
In this method, users are added directly to the ACL for the resource and are granted permissions for that particular resource. The User/ACL method is easy to implement but is only effective in small organizations. It is typically used when an owner of a file or folder resource wants to share access to the file or folder. The User/ACL method does not work well in large organizations where access control has to be effectively implemented and efficiency managed.
Using the Account Group/ACL (AG/ACL) method to control access to resources
In this method, global groups are utilized and not individual user accounts. The global groups are added to the ACL instead of individual user accounts. The group is then assigned access permissions to the resource. When the permissions need to be changed for the particular resource, the permissions for the group need to be amended. Using groups simplifies management.
Using the Account Group/Resource Group method to control access to resources
With this method users with similar access requirements are assigned to account groups. The account groups are then added to a resource group that has the necessary resource access permissions. The Account Group/Resource Group method is typically utilized in large organizations to control access to resources.
Understanding Standard and Special Permissions
You can use standard and special permissions when setting up access control lists for Active Directory objects, services, printers, registry keys, and files and folders. The differences between the two permissions are summarized below:
-
Special Permissions: These permissions enable Administrators to exercise thorough control over the access a user has to an object. When you assign a standard permission, such as the Read & Execute standard permission, a set of special permissions which are associated with the particular standard permission are granted as well. Wen you deny a particular standard permission, the associated special permissions are also denied. You can access these permissions under the Advanced button on the Properties dialog box of the particular object.
-
Standard Permissions: These permissions are evident when you access the Security tab of the properties dialog box of a particular file or folder. The Full Control, Modify, Write, Read & Execute, and Read permissions are standard permissions.
File and folder permissions
The standard file and folder permissions that can be applied to files and folders on NTFS partitions are listed below. The permissions that are available are determined by the security context of the object:
-
Full Control enables users to perform numerous actions on the file or folder including creating and deleting files and folders, changing permissions, taking ownership, and deleting subfolders and files.
-
Modify: This permission allows users to read, edit and delete files and folders. It enables users to perform activities allowed by the Write and Read & Execute permissions.
-
Read & Execute enables users to traverse folders and run applications. Users receive rights assigned via the Read permission and the List Folder Contents permission
-
Read: Enables a user to view the files and subfolders in a folder and view folder attributes, ownership and permissions. Users are able to view a file's contents, attributes, ownership and permissions as well.
-
Write: This permission enables users to create new files and subfolders in the folder, view folder ownership and permissions, change file/folder attributes, and overwrite a file.
-
List Folder Contents: Enables users to browse to a folder and view the names of subfolders and files within the particular folder.
The special or advanced file and folder permissions are listed below. These permissions are automatically selected when one or more of the standard permissions are selected:
-
Traverse Folder/Execute File: The Transverse Folder permission is only for folders. The permission either allows access or denies access to navigate through folders to access other folders or files. Traverse Folder is applied when the user/group does not have the Bypass traverse checking user right. Execute File enables users to execute program files. The permission only applies to files.
-
List Folder/Read Data: List Folder is applicable for folders only, and either allows or denies the viewing of file names and subfolder names in the particular folder. Read Data is for file access, and either allows or denies the viewing of the file's contents.
-
Read Attributes: Either allows or denies the viewing of the attributes of a file/folder.
-
Read Extended Attributes: Either allows or denies the viewing of the extended attributes of a file/folder.
-
Create Files/Write Data: Create Files is applicable to folders only. It allows or denies the creating of files within the folder. Write Data pertains to files, and either allows or denies changes to be made to the file, and for the file's content to be overwritten.
-
Create Folders/Append Data: The Create Folders permission applies to folders and either allows or denies folders to be created within the folder. The Append Data permission is for files and either allows or denies changes to be made to the end of the file. This excludes changing, overwriting and deleting the existing data.
-
Write Attributes: This permission either allows or denies the attributes of files/folders to be changed.
-
Write Extended Attributes: This permission either allows or denies the extended attributes of files/folders to be changed.
-
Delete Subfolders and Files: This permission either allows or denies subfolders and files to be deleted.
-
Delete: This permission either allows or denies folders and files to be deleted.
-
Read Permissions either allows or denies reading permissions on the file/folder. This includes Full Control, Read and Write
-
Change Permissions either allows or denies change permissions on the file/folder. This includes Full Control, Read and Write
-
Take Ownership either allows or denies taking of ownership of a file/folder.
Active Directory permissions
Permissions to Active Directory objects are typically assigned using the Directory Users And Computers (ADUC) console. The standard permissions that can be applied to Active Directory objects are summarized below:
-
Full Control enables users to perform numerous actions on Active Directory objects such as creating/deleting objects. Users can also modify object permissions if assigned the Full Control permission.
-
Read: Enables users to view the properties, permissions, and contents of the Active Directory object
-
Write: This permission enables users to edit the properties of a particular object.
-
Create All Child Objects enables a user to create a type of child object in a container such as an organizational unit (OU).
-
Delete All Child Objects enables a user to delete a type of child object in a container such as an organizational unit (OU).
-
Special permission can also be assigned to users and groups.
Service permissions
You can change service permissions through the Services console. The standard permissions that can be applied to services are summarized below:
-
Full Control enables users to perform numerous actions on a service such as starting/stopping the service, changing the permissions of the service, and defining whether the service starts automatically.
-
Read: Enables users to view the permissions, status of a service, as well as the dependencies associated with a service.
-
Start, Stop, And Pause: Enables users to start, stop and pause the service.
-
Write enables users to define whether the service can be started manually or automatically, and whether it can be disabled.
-
Delete enables users to delete the service
Registry permissions
Access to registry keys and values are typically restricted because recklessly changing these keys or values can have catastrophic consequences. The standard permissions that can be applied to registry keys and values are summarized below:
-
Full Control enables users to perform numerous actions on a registry key and value. This includes creating and deleting registry subkeys and values
-
Read: Enables users to view registry subkeys and values.
-
A few special permissions can also be assigned to a user or group.
Printer permissions
The standard permissions that can be applied to printers are summarized below:
-
Print: Members of the Everyone group are by default assigned the Print permission. This permission enables users to connect to a printer, and transmit documents for printing.
-
Manage Printers: This permission enables users to control the activities of the printer including pausing/restarting the printer, setting Print permissions, changing printer properties, and sharing the printer.
-
Manage Documents allow users to pause, restart, cancel, resume, and rearrange the order by which documents were submitted to the printer.
-
A few special permissions can be assigned for users and groups.
The Different Types of Security Groups
User accounts are members of security groups. The groups which are utilized to manage access are defined by the scope, rights and role of the group. You normally define groups to control user accounts, computer accounts and other group accounts. The scope of a security group can b a computer, a domain, or even multiple domains in a forest. Windows 2000, Windows XP Professional, and Windows Server 2003 groups are part of one of the following types of groups:
-
Computer local groups: These groups are utilized to control permissions to resources that exist on the local computer. You can use the Local Users and Groups snap-in to the Microsoft Management Console (MMC) to change membership to Computer local groups.
-
Global groups. These groups reside in Active Directory and are created on domain controllers. Global groups are utilized to group and manage users that share the same job function, who require similar network access. Global groups can be members of different global groups, domain local groups, and universal groups.
-
Domain local groups too reside in Active Directory. These groups are used to assign permissions to resources which reside in the same domain as the particular domain local group.
-
Universal groups: These groups reside in Active Directory and are only utilized in multiple domain trees or forests that have a global catalog. Universal groups are typically utilized to nest global groups with the purpose of assigning permissions to associated resources in multiple domains.
-
Built-in security principals/special identities: The built-in security principals do not contain members like the previously discussed groups, but apply to an account which utilizes the computer in a particular manner. You can use built-in security principals to specify security according to the manner in which a resource is being accessed.
The following tools and utilities can be utilized to manage security groups and access control.
-
Active Directory Users and Computers (ADUC): You can use ADUC to manage users and groups in Active Directory.
-
Local Users and Groups MMC snap-in: Use Local Users and Groups to create and also modify users and groups in the local user database.
-
Dsadd: You can use this command line tool to create groups and change group membership
-
Getsid: The Getsid command line tool can be used to compare the SIDs of two user accounts.
-
Ifmember: This tool can be used to find the groups that a member is included in.
-
Whoami: This command line tool can be used to view an access token's contents.
Built-in Groups
When you create an Active Directory domain, a few built-in groups are automatically created which can be utilized to manage access to shared resources and to delegate particular domain wide administrative roles. When the built-in groups are created, they are typically also automatically assigned with specific user rights. These user rights in turn determine which activities a group and its associated members can perform in the domain or forest. A few built-in groups are summarized below:
-
Account Operators: Members of the Account Operators group have the Allow logon locally and Shut down the system user rights. Members of these groups can create, modify and delete accounts for users, groups and computers residing in the organizational units (OUs), Users container and Computers container in the domain.
-
Administrators: Members of the Administrators group have most of the available user rights, and have full control over the server. Its members can assign server rights and access control permissions for other users.
-
Backup Operators: The Backup Operators group has no default members. Any members added to the Backup Operators group have the Allow logon locally, Back up files and directories, Restore files and directories and Shut down the system user right by default.
-
Network Configuration Operators: Members of this group can modify the Transmission Control Protocol/Internet Protocol (TCP/IP) settings. They typically manage the network configuration settings of servers and workstationswithin the domain.
-
Incoming Forest Trust Builders: Members added to this group can create incoming forest trusts (one way) to the forest root domain.
-
Print Operators: Members of the Print Operators group can manage Active Directory printer objects in the domain, and can create, share and delete printers that are connected to domain controllers. Group members have the Allow logon locally and Shut down the system default user rights.
-
Server Operators: This group's members have the Allow logon locally, Back up files and directories, Change the system time, Force shutdown from a remote system, Restore files and directories, and Shut down the system default user rights.
-
Remote Desktop Users. Members can remotely log on to domain controllers.
-
Terminal Server License Servers: Members of the Terminal Server License Servers group have permission to access the Terminal Server License servers.
-
Performance Log Users: Members added to the Performance Log Users can manage performance counters, logs and alerts on domain controllers.
-
Performance Monitor Users: This group's members can monitor performance counters on domain controllers.
-
Users: Members of the Users group can run applications, and use network printers.
How to view ACLs
-
Right-click the particular object (file, folder), and choose Properties from the shortcut menu.
-
When the Properties dialog box of the object opens, click the Security tab.
-
The Group or user names box holds the users/groups that have permissions assigned for the particular object. Use the Add button and Remove button to modify this list.
-
When you select a particular user or group, the Permissions for box indicates the permissions allowed or denied for the user/group that you have selected. You can use the Allow and Deny checkboxes to specify permissions.
-
You can click the Advanced button to view or set advanced permissions on the Advanced Security Settings dialog box. This includes:
-
Viewing and changing special permissions for a user/group, and effective permissions
-
Viewing and changing access inheritance settings for the object and any associated child objects
-
Viewing and changing ownership for the object and any associated child objects
-
Viewing auditing information on access to the object
-
How to create a new security group using Active Directory Users And Computers
-
Open Active Directory Users And Computers
-
In the console tree, right-click the Users container, and select New and then Group from the shortcut menu.
-
When the New Object – Group dialog box appears, enter the name of the group in the Group Name field.
-
Click OK
How to set the Administrators group as the owner of objects
-
Open Control Panel, click Performance and Maintenance, and then click Administrative Tools.
-
Proceed to double-click Local Security Policy.
-
Next, double-click Local Policies beneath Security Settings.
-
Click Security Options
-
Open the System objects: Default owner for objects created by members of the administrators group policy
-
Choose Administrators group from the list
-
Click OK
How to view or modify special permissions for files and folders
-
Use Windows Explorer to find the file or folder that you want to view or configure special permissions for.
-
Right-click the file or folder, and choose Properties from the shortcut menu
-
Click the Advanced button
-
If you want to view or change special permissions for an existing user/group, simply select the user/group, and click either View or Edit.
-
If you want to remove a user/group and all its associated special permissions, simply select the user/group, and click Remove.
-
If you want to specify special permissions for a newy created user/group, click Add, and enter the name of the user/group.
How to stop child folders and files from inheriting permission changes performed on parent folders
-
Use Windows Explorer to find the folder you want to configure settings for.
-
Right-click the particular object (folder), and choose Properties from the shortcut menu.
-
When the Properties dialog box of the object opens, click the Security tab, and click the Advanced button.
-
When the Advanced Security Settings dialog box appears, click the Permissions tab
-
Uncheck the Inherit from parent the permission entries that apply to child objects. Include these with entries explicitly defined here checkbox
-
Click OK
How to set permission for files and folders through Group Policy
-
Open Active Directory Users and Computers
-
Right-click the root of the domain, and select Properties from the shortcut menu.
-
Click the Group Policy tab
-
Choose the Default Domain Policy, and then click Edit
-
Proceed to expand Computer Configuration, Windows Settings, and then File System.
-
Right-click File System and then choose Add from the shortcut menu
-
Locate the file/folder which you want to configure permissions for, and click OK
-
You can now set permissions for the file/folder.
How to set security on accounts using Group Policy
-
Open Active Directory Users and Computers
-
Right-click the root of the domain, and select Properties from the shortcut menu.
-
Click the Group Policy tab
-
Choose the Default Domain Policy, and then click Edit
-
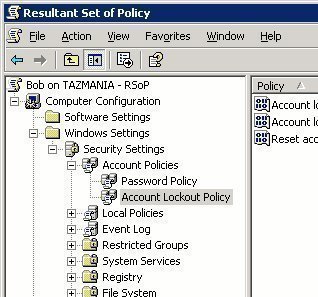
Proceed to expand Computer Configuration, Windows Settings, and then Account Policies
-
You can now specify settings for the following policies:
-
Password policy
-
Account Lockout policy
-
Kerberos policy
-
How to view registry access permissions
Any changes made to the registry keys and values are effective immediately.
-
Click Start, click Run, and enter regedt32 in the Run dialog box. Click OK
-
The Registry Editor now opens.
-
The left pane shows the nodes in the Registry tree, and the right pane details the nodes or keys included in a particular node when you select it from the left pane.
-
The My Computer node contains the following nodes:
-
HKEY_CLASSES_ROOT
-
HKEY_CURRENT_USER
-
HKEY_LOCAL_MACHINE
-
HKEY_USERS
-
HKEY_CURRENT_CONFIG
-
-
The HKEY_CURRENT_USER node includes the Control Panel, Printers, and software keys, as well as other keys.
-
To change permissions for the node, right-click it, and then choose Permissions from the shortcut menu.
-
When the Permissions dialog box for the particular node appears, set the appropriate permissions.
-
Click the Advanced button to specify advanced settings.
How to set Registry access permissions using Group Policy
-
Click Start, click Run, and enter mmc in the Run dialog box. Click OK
-
When the Microsoft MMC opens, click File, and Add/Remove Snap-in
-
When the Add/Remove Snap-in dialog box opens, click Add to find the Group Policy Object Editor
-
Click Add to start the Select Group Policy Object Wizard
-
Because the default Group Policy Object (GPO) specified is Local Computer, click Browse to locate the Default Domain Policy. Click OK
-
Close the wizard and all open dialog boxes.
-
In the left tree, expand Default Domain Policy, Computer Configuration, Windows Settings, and Security Settings.
-
Locate and select the Registry node to expand the tree of this node. You can change any existing polices from here, and add new keys.
How to audit access control
You can enable audit polices to monitor and track authorized access and unauthorized access to resources. Because auditing typically affects performance, you should carefull plan which resources you want to audit access for. The following audit polices can be enabled:
-
Audit account logon events: When enabled, an event is logged when a user attempts to log on. You can specify whether to track success logon events, failed logon events, or both of these events.
-
Audit Account management: When enabled, an event is logged when an account is managed. This includes activities such as deleting accounts, and changing passwords.
-
Audit directory service access: When enabled, Active Directory objects with a system access control list (SACL) specified is tracked.
-
Audit logon events: When enabled, logon events that occur over the network such as accessing resources on file and print servers are tracked.
-
Audit object access: When enabled, users accessing objects such as files, folders, shared folders, Registry keys, and printers are tracked.
-
Audit policy change: When enabled, changes to Audit policies, Kerberos policies and User Rights Assignment policies are tracked.
-
Audit privilege use: When enabled, a user is audited when he/she utilizes special privileges.
-
Audit process tracking: When enabled, the activities of a process initiated by a user are tracked.
-
Audit system events: When enabled, certain system events such as restarting a computer are tracked.
How to enable auditing for a file or folder
-
Use Windows Explorer to find the file or folder that you want to view or configure auditing for.
-
Right-click the particular object (file, folder), and choose Properties from the shortcut menu.
-
When the Properties dialog box of the object opens, click the Security tab, and click the Advanced button.
-
When the Advanced Security Settings dialog box appears, click the Auditing tab.
-
Click Add and choose the users/groups that you want to audit.
-
You next have to indicate whether you want to audit success, failure, or both of these.
-
Click OK
How to enable auditing via Group Policy
-
Open Active Directory Users and Computers
-
Right-click the root of the domain, and select Properties from the shortcut menu.
-
Click the Group Policy tab, choose the Default Domain Policy, and then click Edit
-
Proceed to expand Computer Configuration, Windows Settings, Security Settings, Local Policies, and Audit Policy.
-
Proceed to enable the appropriate audit policies, and specify whether you want to audit success, failure, or both of these.

Sachin
Firstly thanks for such nice article. Here I have one question; Can I give that Active directory permission for users grammatically, using C#/ asp.net. If yes, can u send me some code snippet on sachin.gangarde@gmail.com.