One of the better functions of Microsoft Word is the ability to change the layout of the page so that you can create different sized documents. Making index cards in Microsoft Word is very easy and, if your printer is good, they will print and read very good. It is important, though, to get blank index cards because getting the words to match up with the lines on the index cards is nearly impossible and will result in a waste of cards.
Determine the size of the index cards you'll be using. The generic size is a 3×5, but you can use any size that you see fit. Therefore, pick the size of index card you want and place them in your printer. To make them stay in place, it doesn't hurt to put the stack of index cards on top of five sheets of printing paper. It makes it easier for the index cards to stand.
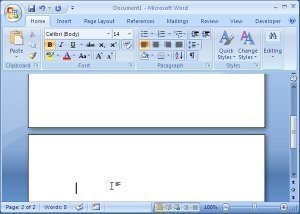
When looking at the Microsoft Word home page, click Page Layout on the top ribbon. This will change the tabs below it to a list of different page layout ones. On the page layout section of tabs, click the size button which will bring a pop up. This is the sizing window where you can change the size of the page to fit your needs. Click the paper tab and then click custom so that you can put your own sizes in. Put 5" for the width and 3" for the height–or whatever your specifications are.
Close the size tab down and then move your mouse over to the orientation. Currently, the index card is going to be shaped as a portrait; however, to maximize space, change it to landscape. This is typically how most people use index card and therefore, it makes sense to print this way.
Begin typing and inserting charts and graphs as you see fit. It will only allow you to put what will fit on the index card, so put as much as you want. Hit the page break button to get to the next index card. If you are dealing with the need for a front and a back, put the front information on the first index card, hit page break and then put the other information on the next index card.
When you've finished creating your index cards, open the print feature and select your printer. To get the index cards to print on both sides, click the "manual duplex" tab to allow for printing on both sides. Once the index cards are done, proceed with your studying for your presentation.


Follow Us!