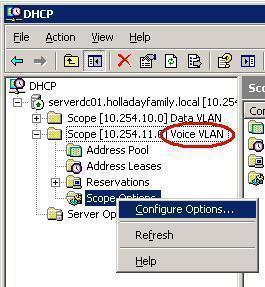
A DHCP scope is a valid range of IP addresses that are available for assignment or lease to client computers on a particular subnet. In a DHCP server, a scope is configured to determine the address pool of IPs that the server can provide to DHCP clients.
Scopes determine which IP addresses are provided to the clients. They should be defined and activated before DHCP clients use the DHCP server for its dynamic IP configuration. Users can configure as many scopes on a DHCP server as required in the network environment.
DHCP Scope Properties
| Scope Property | Description |
|---|---|
| Network ID | The network ID for the range of IP addresses |
| Subnet mask | The subnet mask for the network ID |
| Network IP address range | The range of IP addresses that are available to clients |
| Lease duration | The period of time that the DHCP server holds a leased IP address for a client before removing the lease. |
| Router | A DHCP option that allows DHCP clients to access remote networks. |
| Scope name | An alphanumeric identifier for administrative purposes. |
| Exclusion range | The range of IP addresses in the scope that is excluded from being leased. |
Each subnet can have a single DHCP scope that has a single continuous range of IP addresses. Specific addresses or groups of addresses can be excluded from the range that the DHCP scope specifies. Normally, only one scope can be assigned to a subnet. If more than one scope is required on a subnet, the scopes must first be created then combined into a super scope.
For example, if there are two subnets, then users can create two separate scopes for the separate subnets on one DHCP server. Users create a separate scope because the subnets have different IP addressing schemes.
Configuring DHCP Scopes in the Microsoft DHCP Server
- Open the DHCP console.
- In the console tree, click applicable DHCP server.
- On the action menu, click applicable DHCP server.
- In the new scope wizard, click next.
- On the scope name page, configure the name and description.
- On the IP address range page, configure the start IP address, end IP address, and subnet mask.
- On add exclusive page, configure the start IP address and end IP address if applicable. If there is one IP address exclusion, configure only that IP address as the start IP address.
- On the lease duration page, configure the days, hours, and minutes.
- On the configure DHCP option page, select “no, I will configure these options later.”
- On the completing new scope wizard page, click finish.

TroySchuster
Good article, but I was after a little more.
I am adding a second Scope to our DHCP server, specifically for a WLAN network. I want all our wireless devices assigned on this new second scope as our primary scope for the LAN is low on IPs (10.0.1.xx).
I’ve created a new scope (10.0.10.xx). When I hard configure a second NIC in the Server for this scope when I assign the default gateway I am prompted with “Warning – Multiple default gateways are intended to provide redundancy to a single….”
My question is, is this correct or am I doing something wrong? I want users on the WLAN to gain access to our Internet connectivity and access to our fileservers. Is it safe to choose Yes or should I configure things differently?
Any help would be appreciated…
Daniel
Yes its safe to use, grant them the access. Get the users IP address and add it in the scope. Good Luck buddy.
ahmed
how many scope i can do
Md.Juned
thanks for this information and it is really needful for server engineer
kamaal
thanks a lot i was searching information about dhcp server and i found in web page so thanks a lot byeeeeeeeeeeeeeeeeeeeeeeeee