Free to air receivers (FTAs) are designed to receive unencrypted satellite television and radio programming without paying for a subscription service. By installing a suitable satellite dish and FTA receiver, a consumer is able to enjoy a large number of television channels. Most FTA receivers are designed to receive FTA signals encoded using MPEG-2 video; however, some programming can be restricted based on geographic area.
What Equipment is Required to Enjoy Free to Air Programming?
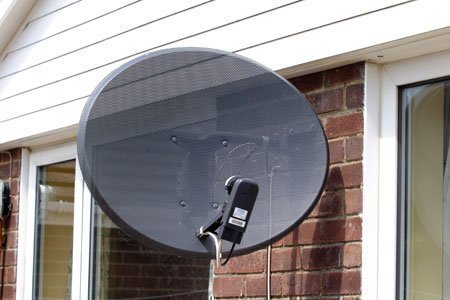
The basic requirements for enjoying FTA programming are a satellite dish meeting the specifics required for the broadcasting service, an FTA receiver, a satellite dish motor if you want to use more than one satellite at a time, a LNBF, and coaxial cable to run from the dish to the free to air (FTA) receiver. When setting up a FTA service, both C and K band dishes generally work for most consumers. Most programming found today is transmitted n the 11.7 to 12.2 GHz Ku band using the DVB-S standard which allows smaller dishes such as those used with the popular Dish Network and DirecTV commercial services. Early users of FTA services primarily installed larger C-band dishes that were initially designed to receive analog and later digital programming in the 3.7 to 4.2 GHz frequency bands. Most FTA receivers sold on the market today require firmware for the device be updated on a regular basis to ensure services can be sustained at the installation location.
What are the Desired Features in an FTA Receiver?
Some of the important features that one should look for when shopping for a Free to Air receiver include:
– Is there an EPB (Electronic Program Guide) included with the receiver?

– Is there a built-in DVR or PVR (Personal Video Recorder) capability included with the receiver?
– Is there a S-Video output for the receiver?
– Does the receiver support OSD (On Screen Display)?
– Does the OSD include the ability to rename, move, and delete channels?
– Is there a dual tuner capability on the receiver to allow you to record one channel while watching another?
– Does the receiver have picture-in-picture capability?
– Is Dolby SPDIF output capability supported by the receiver?
– Is there a PIG/PIP interface installed on the receiver?
– Is there a “Blind Search Power Scan” capability to find all channels transmitted by a given satellite?
Popular FTA Satellite Receiver Vendors
The following are some of the popular FTA satellite receiver vendors on the market at the time of this writing.
Coolsat Receivers – Coolsat uses state of the art FTA technology. Coolsat 5000 or the Coolsat 6000 are good products. Coolsat 5000 is one of the popular Coolsat series products, with Coolsat 6000 also being a top class product. Coolsat products are also bundled with 5 years warranty with new models being released as technology improves.
Fortec Receiver – Fortec Lifetime Ultra is a decent product for most television viewers.
Pansat Receiver – Pansat is one of the major companies in the satellite television business. The company’s product range includes: Pansat 2500 Bin, Pansat 2500a, Pansat 2700, Pansat 2700a, Pansat 3500, Pansat 3500 Receiver, Pansat 3500 Receivers, Pansat 3500 SD, Pansat Bin, Pansat Files, Pansat Key Data, and Pansat Last Bin.
Viewsat – Viewsat provides a wide range of products that cater to satellite television consumers. Some of the popular Viewsat products include Viewsat 2000, Viewsat Files, Viewsat Receiver, Viewsat Ultra, and Viewsat Xtreme.
Sonicview Receiver – Sonicview has a high competitive edge on Pansat and Viewsat. There are numerous features on their latest receivers to include most of the desirable features in a FTA receiver.
Additional quality FTA satellite receiver manufacturers include Ariza, BlackBird, Digiwave, MultiStar, Twinhan, and UltraStar.
How Do You Setup a FTA Satellite Dish?
The initial setup of an FTA satellite dish can prove to be a bit challenging for the consumer who is new to free to air programming. Most satellites will be in orbit about the Earth at a range of more than 22,000 miles making the task of finding the correct satellite a potentially difficult task. The following are basic guidelines to follow when setting up a FTA dish.
Step 1 – Use a tool such as the Sadoun Satellite Look Angle Calculator to obtain the required information to aim your satellite dish. The tool is based on the Google Maps API and requires the consumer to enter their current street address. Once loaded, the page will provide a listing of available satellites that are visible from the input location.
Step 2 – View the output of the Satellite Look Angle Calculator once you have selected the desired satellite. The information will need to be recorded for entry into your FTA receiver or for direct use in aiming the satellite dish. The information output will be the exact latitude and longitude of the dwelling or home, the elevation for the dish (number of degrees above the horizontal the dish will need to be to find the southern-most satellite), the azimuth of the southernmost satellite, and both the true/magnetic azimuth of the location.
Step 3 – If the satellite dish as a motor, center the dish at in the middle of the range. There will normally be a scale located around the mounting tube which holds the dish. There will likely be a mechanical switch that will trip when the dish passes the zero mark that can be audibly heard if it is not possible to view the scale when moving the dish.
Step 4 – There should also be a scale located on the side of the motor mount representing the latitude for the dish (how far either south or north of the equator that the dish is located). Adjust the scale to be as close as possible to the latitude for your home’s location.
Step 5 – Using an engineering compass, site a bearing on the magnetic azimuth provided by the Satellite Look Angle Calculator. Once the bearing is taken, twist the clamps holding the satellite dish in place to have the center of the dish point in that direction. It may take a number of attempts to properly sight the dish depending on how you have it mounted.
Step 6 – Set the elevation of the dish by locating the base elevation of the motor mount (normally located in the owner’s manual or on the manufacturer’s website). Then, subtract the elevation provided by the Satellite Look Angle Calculator. Use the elevation adjustor located on the side of the dish mount to make the appropriate setting.
Step 7 – Set an inclinometer on the dish’s LNBF and rotate until the pointer of the device shows the appropriate skew number for the location. After initial setup, the LNBF adjustment can be further refined by having an assistant monitor the signal quality display on the satellite receiver while making additional adjustments until you have a clear television picture.
How Do You Setup a Free to Air Receiver?
Although a properly installed free to air receiver lets a consumer enjoy free satellite television programming, most devices require an initial setup or configuration after purchase before a consumer can start watching FTA programming. In recent years, FTA receivers have also been upgraded to support HD broadcasts and Digital Video Recorder (DVR) services equivalent to what is provided by commercial satellite services.
Step 1 – If your home does not already have a coaxial cable run from the satellite dish installation point to the external cable box, you will need to run the cable. This step can prove to be the most difficult for many consumers. You will need to purchase enough coaxial cable to make it from the dish to the cable box as well as the appropriate fasteners for the structure of the home or apartment. Some consumers will contract this part of the process to a professional installation service to avoid potential injury or damaging the dwelling. Connect the cable to the LNB coaxial port on the FTA dish.
Step 2 – If the dwelling does not have an external cable box to terminate the coaxial line form the satellite dish, you will need to choose an appropriate point to run the cable into the home or apartment. For most homes, this location will either be the attic or from the crawl space beneath the home. Depending on the length of the coaxial run, you might find it necessary at a later point to install a signal booster on the coaxial line.
Step 3 – Place the free to air receiver in the desired location in the apartment or home.
Step 4 – Connect the coaxial cable to the “SAT IN” port on the free to air receiver. For most receivers, this port will be located on the back of the device.
Step 5 – Ensure you match the yellow, white, and red cables on the receiver’s “OUT” port to the same ports on the television. If you have a newer receiver, there may be a digital or HDMI out port that can be used. Most receivers will not sell with the appropriate connecting cable for the television, so you will want to verify what type of connections are supported before starting the FTA receiver installation process.
Step 6 – Insert the free to air receiver’s power cable into an appropriate power source and turn on the device.
Step 7 – Turn on the television set and change the input source to the one being used by the FTA receiver.
Step 8 – Using the FTA receiver remote control (or control panel on the set top box), select the “Satellite” menu option. Then, pick the satellite that you installed the dish to receive from the available listing of available satellites from the menu. Once you have found the appropriate option, press the “OK” or equivalent menu option.
Step 9 – Choose the “LNB” heading menu option from the FTA receiver menu. Then, select the appropriate LNB type for the dish and the associated frequency.
Step 10 – Pick the “Satellite Scan” or equivalent menu option to download the available channels from the satellite that the dish is setup to receive programming from.
Step 11 – If required, restart the free to air receiver and start enjoying the free television programming.
How Do You Program a Free to Air Receiver?
Most free to air receivers are designed to be updated at various intervals with revised firmware to ensure the quality of operation remains consistent. The firmware updates typically consist of a new “.bin” file that includes the current stations and programming for the supported satellites. These files are typically downloaded from the FTA receiver manufacturer’s website and then installed onto the set top box.
Step 1 – Launch the Internet browser on a computer that is online.
Step 2 – Navigate to the website of the free to air receiver’s manufacturer.
Step 3 – Choose the receiver installed in the home from the available listing on the website.
Step 4 – Select the download link beside the latest firmware update or .bin file on the site. Accept any menu prompts and continue with downloading the file(s) to your computer.
Step 5 – Insert a USB flash drive into the computer. Move or transfer the firmware updates to the drive and then remove the device.
Step 6 – Turn off the FTA receiver unless the directions that came with the device state otherwise.
Step 7 – Plug the USB flash drive into the appropriate USB port on your free to air receiver and turn on the device.
Step 8 – Once the receiver detects the drive, the firmware will automatically be uploaded to the device. Ensure the television is turned on to see a real-time update of the installation progress.
Step 9 – Restart the FTA receiver if it does not automatically do so after the firmware update is complete to finish the installation process.


Richard Beaulac
What’s a good receiver to buy for Bell TV I am from Canada
aracely pina
or 602 4004229
aracely pina
i need an installer for my dream box my name is aracely pina 623 4180508 thanks
Will.Spencer
Originally posted by martellis: “what are any good fta receivers that work”
These are some of the most recommended models:
Viewsat Ultra
Nfusion Nova
Nfusion HD
Viewsat Ultra Lite
Viewsat MaxHD
The DreamBox is pretty awesome also. 🙂
martellis
what are any good fta receivers that work