Similar to Windows 8, Window 10 has spell checker enabled by default. Beside highlighting misspelled words while using different programs or apps, Windows will try to correct your errors by automatically changing the misspelled words into correct ones.
This usually works well but sometimes will get you in funny situations.
If you are a person who hates this feature for any reason, Microsoft provided an easy way to disable the Windows 10 auto-correct and spell checker tool.
In order to disable it follow these steps:
- Click the “Start” button
- Click on the “Settings” option
- Click on “Devices”
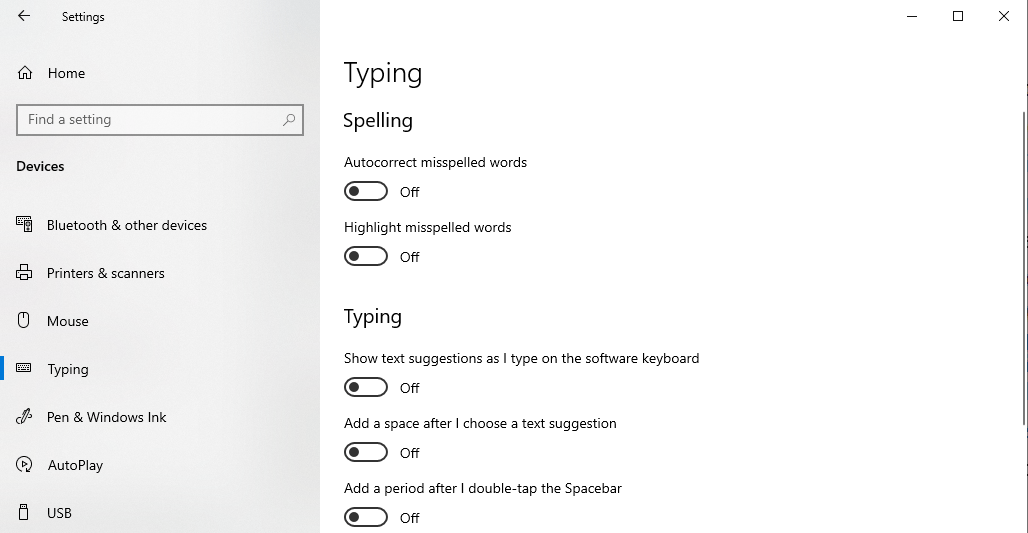
- In left pane click on the option “Typing”
- On the top of the opened window, under section “Spelling”, move slider to “Off” for the “Autocorrect misspelled words” and “Highlight misspelled words” options.
Additionally, under section “Typing” you can disable options which show text suggestions as you type, adding space after you picked text suggestion or add period on double-tapping the spacebar.
You should be aware that Windows 10 spell checker does not work everywhere automatically. For example, it works in Edge Browser and Facebook app, but it does not work in Opera browser or Microsoft Office with its spell checker enabled. This is because Microsoft left the freedom to developers to choose if they need Windows 10 spelling and auto-correct options.
If you can’t disable the auto-correct and spell checker in the previously mentioned way, then that means that you have group policies which have precedence over your personal settings.
You will then need to take additional steps to disable it:
- Click the “Start” button
- Type “gpedit.msc” without quotes
- Run the gpedit.msc app
- Double click the “User Configuration”
- Double click the “Administrative Templates”
- Double click the “Control Panel”
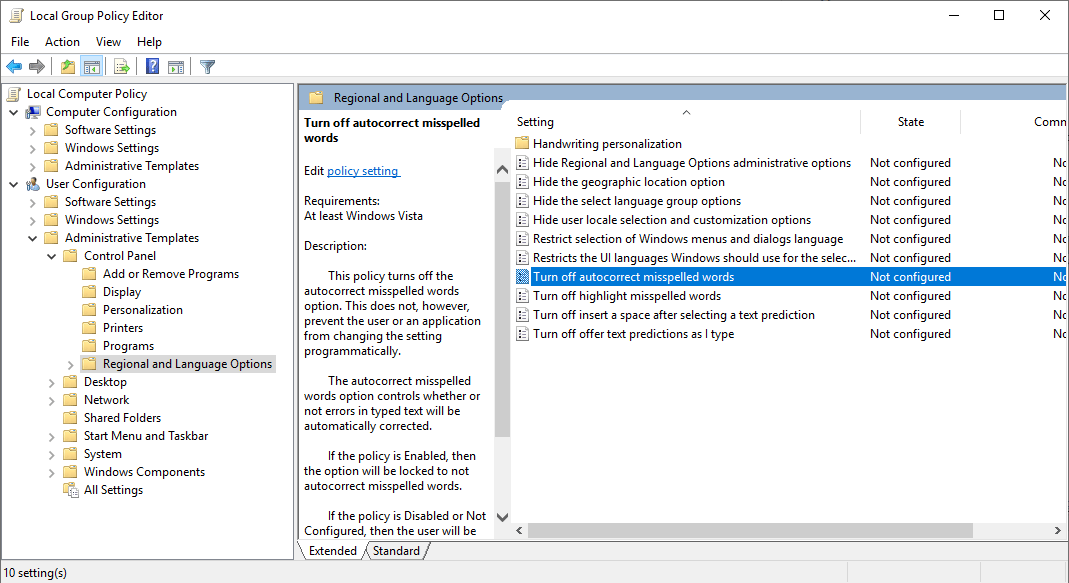
- Double click the “Regional and Language Options”
- Double click the “Turn off autocorrect misspelled words”
- Check the “Disabled” checkbox
- Hit “Apply” and “OK” buttons
- Double click the “Turn off highlight misspelled words”
- Check the “Disabled” checkbox
- Hit “Apply” and “OK” buttons
- Close the “Local Group Policy Editor” window
That’s about it. After modifying these two settings you will need to restart the app, so that the new settings are deployed.
Follow Us!