Registry is a system component of Windows. It stores all the preferences for the Windows operating system. These preferences are saved in a key-value format.
The key-value pairs are structured in a hierarchical tree-like format within a Windows registry. They can be navigated and modified. Modifications to these pairs are generally done via programs or the OS. However, manual changes can be done to enable/disable certain features of Windows.
To open the registry in your Windows, go to Start and type regedit.exe. Click Enter. The Registry Editor will open.
Let’s see how you can hack the registry of Windows to enjoy some of the hidden features of the operating system.
WARNING: Registry is a critical part of Windows. Any type of improper modification may lead to a system crash. Therefore, you should perform the below steps at your own risk.
Windows 8
Set the maximum number of Tile rows on the Start screen
Start Menu in the previous versions of Windows was replaced by the Start screen in Windows 8. The Start screen display blocks called Tiles. These Tiles are either programs, apps, or live streaming. The number of rows, which show the Tiles, vary depending on your screen resolution. However, you can set the maximum number of Tile rows via registry.
Go to the following branch of your registry:
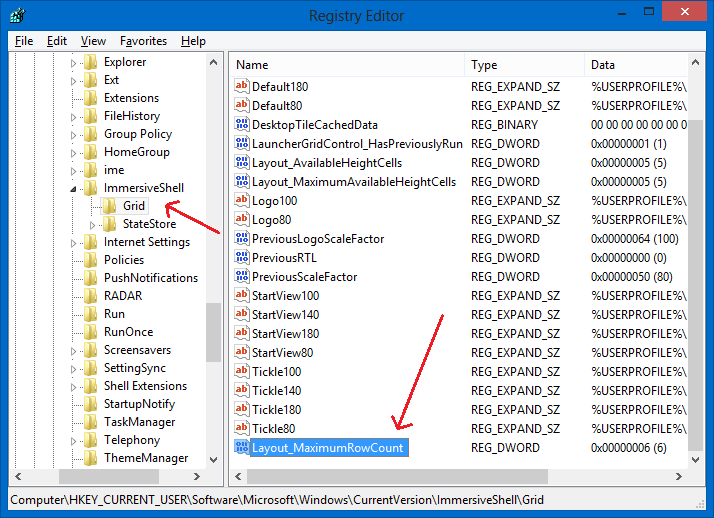
HKEY_CURRENT_USER\Software\Microsoft\Windows\CurrentVersion\ImmersiveShell\Grid
Right-click on Grid in the left-pane, select New > DWORD (32-bit) Value. Rename the newly created key to Layout_MaximumRowCount. Double-click the key. Enter the number of rows in the Value data field. Check the Decimal option. Click OK.
You will need to either restart or log off your computer for the changes to take effect.
Set Windows border size
With introduction of Metro UI in Windows, the borders of any Windows screen have become flatter and thicker. Thick borders may take up quite a lot of space on your screen. Especially when your screen size or resolution is small. You can remove or reduce the border thickness via Windows registry.
Go to the following branch of your registry:
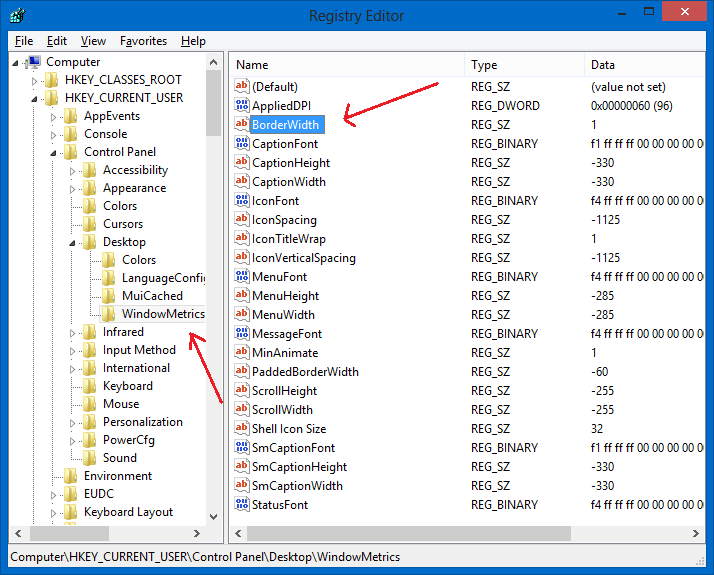
HKEY_CURRENT_USER\Control Panel\Desktop\WindowMetrics
Search for the BorderWidth key in the right-pane. The value is set to -15 by default. Double-click the key. Enter a value from 0 to 50 in the Value data field. Click OK.
Set custom vertical and horizontal spacing for Desktop icons
You may not be comfortable with the default vertical and horizontal spacing between the Desktop icons on your computer. You may desire more or less space between the icons. This can be achieved via registry.
![]()
Go to the following branch of your registry:
HKEY_CURRENT_USER\Control Panel\Desktop\WindowMetrics
Search for the IconSpacing key in the right-pane. The value is set to -1125 by default. Double-click the key. Enter a custom value in the Value data field. Higher the value, more will be the horizontal spacing. Click OK.
Search for the IconVerticalSpacing key in the right-pane. The value is set to -1125 by default. Double-click the key. Enter a custom value in the Value data field. Higher the value, more will be the vertical spacing. Click OK.
Animated Start screen
This hack helps animate your Start screen. It adds a sliding animation to the screen and Tiles whenever you start the Start screen.
Go to the following branch of your registry:
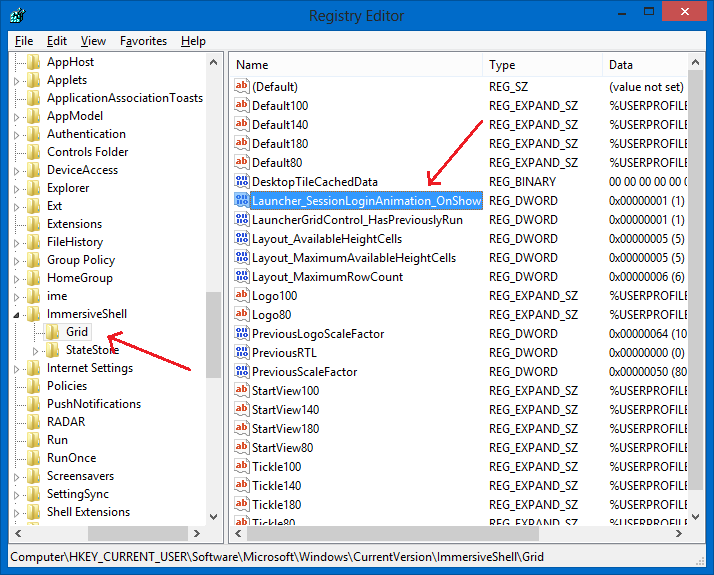
HKEY_CURRENT_USER\Software\Microsoft\Windows\CurrentVersion\ImmersiveShell\Grid
Right-click on Grid in the left-pane, select New > DWORD (32-bit) Value. Rename the newly created key to Launcher_SessionLoginAnimation_OnShow. Double-click the key. Enter 1 in the Value data field. Check the Decimal option. Click OK.
Close the Registry Editor. Go to Start or hit the WIN key on your keyboard. You will see the Start screen appears with an enhanced sliding animation.
Enable former Start Menu, Disable Metro UI
This trick only works in Windows 8 Consumer Preview. Microsoft was then smart enough to remove this hack in the final releases of all the versions.
This method involves a small registry trick which can enable old Start Menu in Windows 8. Please keep in mind this registry trick will also disable the new Metro UI stuff and ribbon in Windows Explorer.
Go to the following branch of your registry:
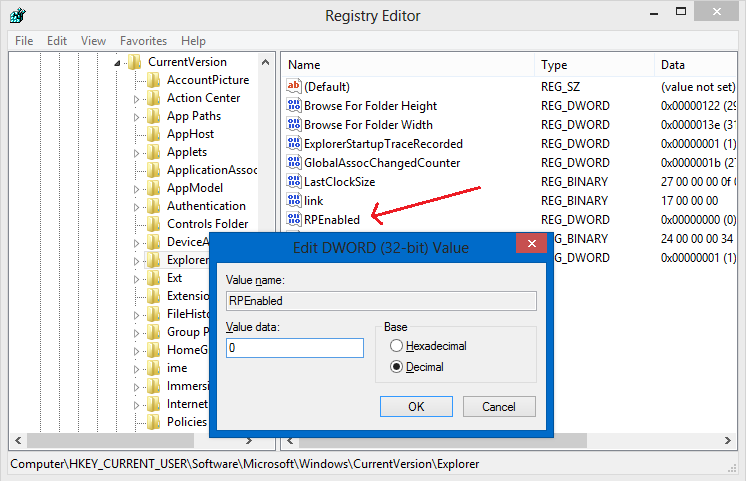
HKEY_CURRENT_USER\Software\Microsoft\Windows\CurrentVersion\Explorer
Search for a key named RPEnabled in the right-pane. If you don’t find one, create one. Right-click on Explorer in the left-pane, select New > DWORD (32-bit) Value. Rename the newly created key to RPEnabled. Double-click the key. Enter 0 in the Value data field. Check the Decimal option. Click OK.
Unlock inbuilt Modern (PDF) Reader
Microsoft added an inbuilt PDF reader in Windows 8. This application allows you to read PDF files. It is named as Modern Reader by Microsoft. You can enable this feature by a registry hack.
Go to the following branch of your registry:
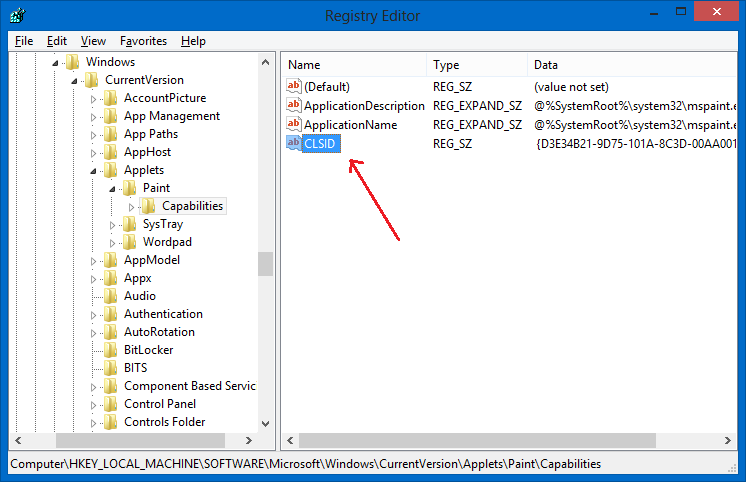
HKEY_LOCAL_MACHINE\SOFTWARE\Microsoft\Windows\CurrentVersion\Applets\Paint\Capabilities
Right-click on Capabilities in the left-pane. Select New > String Value. Rename the newly created key as CLSID. Double-click the key. Enter {D3E34B21-9D75-101A-8C3D-00AA001A1652} in the Value data field. Click OK.
Enable file delete confirmation dialog
Windows 8 doesn’t give any confirmation when you delete a file. It straightaway sends a file to the Recycle Bin. This can be risky, you could unintentionally delete an important file. To avoid such a catastrophe, you can enable delete confirmation via a registry hack.
Go to the following branch of your registry:
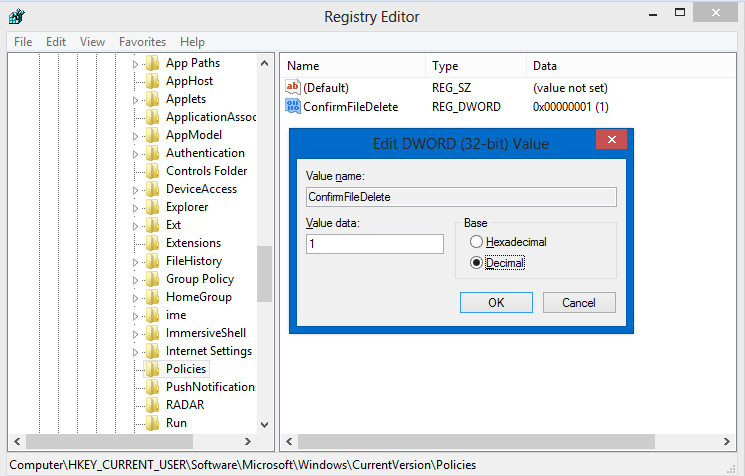
HKEY_CURRENT_USER\Software\Microsoft\Windows\CurrentVersion\Policies
Right-click on Policies in the left-pane. Select New > DWORD (32-bit). Rename the new key to ConfirmFileDelete. Double-click the key. Enter 1 in the Value data field to enable delete confirmation. Enter 0 to disable delete confirmation. Select Decimal. Click OK.
Registered Organization, Registered Owner
Go to the Start screen and type winver. Click winver.exe when found. A dialog box will appear which will show information about your Windows 8. It also shows the registered organization and registered owner under This product is licensed under the Microsoft Software License Terms to section.
You can change the registered organization and registered owner via a registry hack. These will then show up on the winver dialog.
Go to the following branch of your registry:
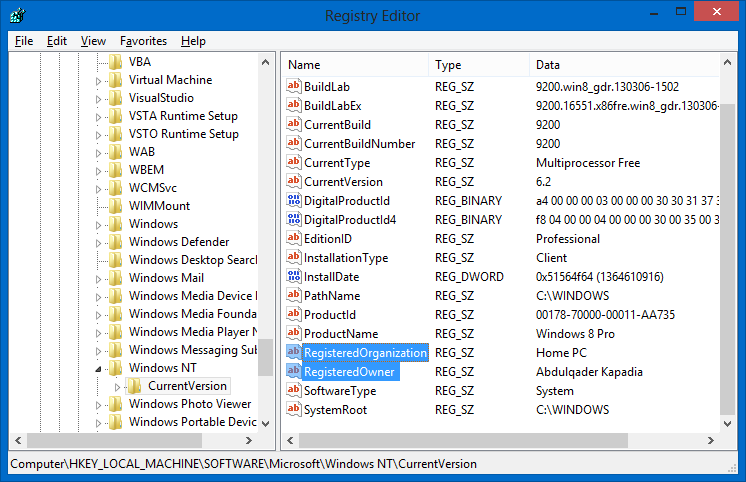
HKEY_LOCAL_MACHINE\SOFTWARE\Microsoft\Windows NT\CurrentVersion
Search for a key named RegisteredOrganization in the right-pane. Double-click the key. Enter whatever you wish in the Value data field. Click OK.
Search for a key named RegisteredOwner in the right-pane. Double-click the key. Enter whatever you wish in the Value data field. Click OK.
If you run winver.exe again, you will see the changes in that dialog box.
Show Windows version and build on Desktop
You can add Windows 8 version number and build number on your Desktop. This is specially handy when you have multiple computers running different Windows 8 versions for testing or development. You can quickly know the version looking at the Desktop. This painting of Windows 8 version number and build number on your Desktop can be done via a registry hack.
Go to the following branch of your registry:
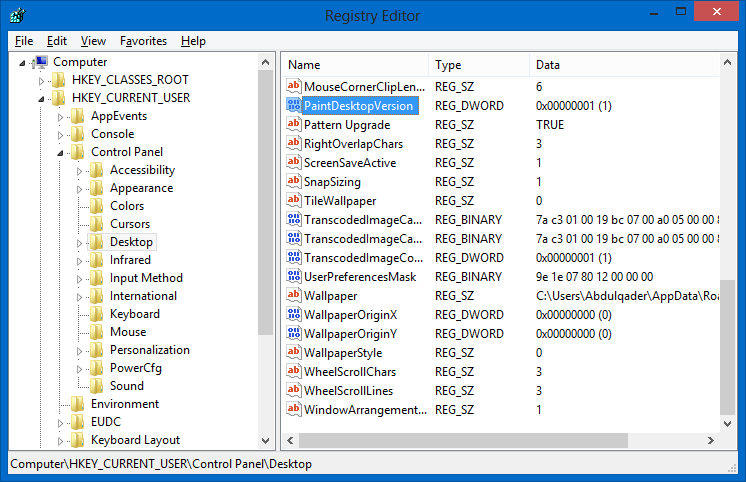
HKEY_CURRENT_USER\Control Panel\Desktop
Search for the PaintDesktopVersion key in the right-pane. Double-click the key. Change the value from 0 to 1 in the Value data field. Log off and log in again. You will see your Windows 8 version number and build number on the Desktop.
Disallow users to uninstall apps
Windows 8 allows downloading of apps from the Microsoft Store. These apps can be installed and uninstalled by anyone using the computer. If you wish to disallow users other than you, then you can create a separate user account and prevent those logged in to uninstall apps.
Go to the following branch of your registry:
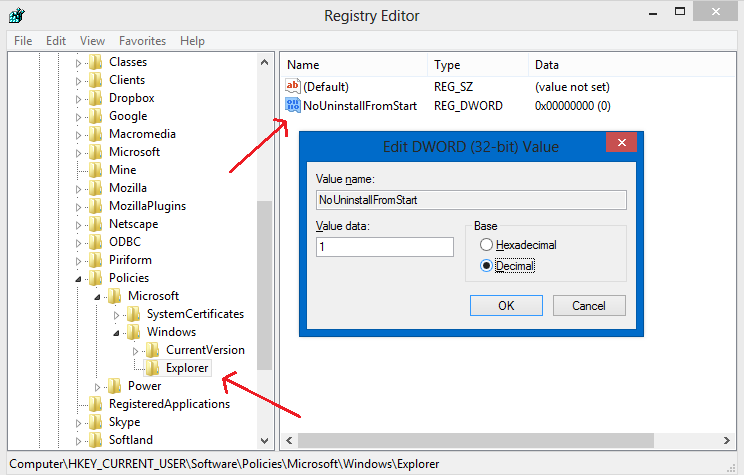
HKEY_CURRENT_USER\Software\Policies\Microsoft\Windows\Explorer
The Explorer branch won’t be present under Windows. You will need to create it. Right-click on Windows in the left-pane. Select New > Key. Name it Explorer.
Now right-click on Explorer in the left-pane. Go to New > DWORD (32-bit). Rename the newly created DWORD as NoUninstallFromStart. Double-click the DWORD. Enter 1 in the Value data field. Select Decimal. Click OK.
You will need to log off and log in again. Now if you right-click on any Metro app, the Uninstall option won’t be available.
Many of the above registry hacks will require you to either log off or restart your computer.
Do you know of more registry hacks for Windows? Share in the comments below!
Follow Us!