Prior to revising your Virtual Memory settings, you should check on how much Virtual Memory you would need, based on how much RAM you do have and how memory-intensive your normal applications are.
Specifying Virtual Memory Settings
The best way to do this is by installing the built-in System Monitor applet from the Add/Remove Program component in the Control Panel. Go to Windows Setup, highlight System Tools and click Details. Put a check on System Monitor and then hit the OK button, and exit the program. A prompt will appear to insert the Windows CD. Do so and follow the instructions to set up System Monitor.
Use this for a few days to monitor the size of the swap file, available (or free) physical memory and the swap file in use as you work. This will give you a better idea of the adjustments you need to make.
Adjusting Virtual Memory Settings
The required settings can be accessed from within the System Control Panel applet which is accessible by right-clicking on the My Computer symbol and then clicking on Properties from the drop-down menu. The other approach is to click on the Start button, go to Settings/Control Panel/System. When the applet opens, choose the Properties button and click on Virtual Memory.
For Windows XP, the sequence is to right-click on My Computer, choose Properties, go to the Advanced tab button, click Performance Settings, click on Settings, click on the Advanced tab once again and in the Virtual Memory section, click Change.
The default setting for this is set on the “Let Windows Manage my virtual memory” option. Click the “Let me specify my own” and select the drive where you will put the swap file on by clicking the drop-down list in the Hard Disk field and specify the maximum and minimum swap file size in the proper fields. Once the parameters are set, exit the system and reboot the computer.
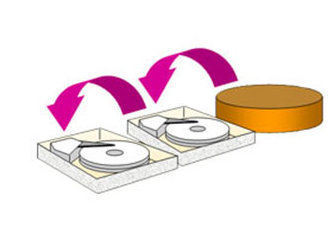
Dual Hard Disk Drives
If you have two hard disks in your computer, choose the second hard drive for the swap file to reside on. Windows will be working from the C: drive (your primary hard drive) AND simultaneously swap program codes and data to and from the swap file on the other drive.
What Size Swap File?
Using a fixed swap file size means that the swap or page file will be static so that it will occupy side-by-side cluster chains and will run little risk of fragmentation. At the same time, Windows will not need to waste time or resources in sizing or resizing the swap file. The downside to this is that the swap file cannot go beyond the maximum size when needed – which can lead to a system crash.
The best approach is to set up a minimum swap file size that is larger that would ever be needed. Find out how much actual memory is used by the Swap File when you’re using memory-intensive programs and set the minimum Swap File size to a higher level.

Jerry
Swap file and page files are different things what you change in virtual memory is page file, but swap file is set to 256MB and there is no way to change it.
KC8DKT
!! THEY ARE NOT THE SAME THING !!
Its sad that a “Tech” site with the heading “How to Change the Swap File Settings” is telling you how to change the “pagefile.sys” size. 5+ year old article and still not fixed…
Lou
I have two drives C: and D: — how do I select D: drive for the page swop file?
thank you!