Fonts are typefaces that we see on the monitor screen. Arial and Times New Roman are examples of fonts, and they outline the shape of the characters that appear on the screen. A font could be a serif font or a sans serif font and can be used in several different sizes.
There are basically three types of fonts:
- TrueType fonts that you can use on any version of the Microsoft Windows operating system.
- OpenType fonts that you can use with Microsoft Windows 2000 and later versions.
- PostScript Type1 fonts that require Adobe Type Manager or Adobe Type Manager Deluxe to be installed. Since ATM comes as a part of Windows 2000 and above, there is no need to install it in case of these versions.
Some versions of Windows might automatically install the fonts for you. If the fonts you want to install are contained in a zip file, then you can open the zip file and drag and drop the .ttf files from this temporary folder to c:windowsfonts or c:winntfonts, whichever is applicable to your PC, depending on your Windows version. Depending on your version of Windows, the fonts might be automatically installed.
However, if you find that this does not work, try the following:
- Click on the “Start” button and then click on “My Computer”.
- Double click on “Control panel”.
- Double click on “Fonts”.
- You will now see all the files for fonts installed on your PC.
- Click on “File” at the top left; alternatively you could press ‘Alt’ and ‘F’ keys simultaneously. When the menu appears, click on “Install new font” or “Add font” whichever is applicable to your PC. Select the drive and folder in which the fonts you wish to install are in.
- Once you have done this, a list will appear under “List of fonts”. If you want to select all, click on the “Select all” button. If you want to select one, click on the particular one. If you want to select a few contiguous ones, click on the first one and keeping the “Shift” key pressed, click on the last one. If you want to select some which are not contiguous, click on one, then keeping the ‘Ctrl’ key pressed, go on clicking on all those that you wish to select.
- Now click on the ‘OK’ button to install the font.
If you are attempting to install a font which has already been installed, it will give you a warning message saying that it already exists and if you want to install a new version, you have to first delete the old one. Just click on the “OK” button. You can delete a font by first clicking on the font in the c:windowsfonts or c:winntfonts folder and then pressing the “Delete” key.
If the “Install new font” option on your PC is disabled or grayed out, go to MS-DOS prompt (click on “Start” button and then on “Run”. Type “command” without the quotes in the box provided and hit the “Enter” key.)
Then type in the following lines followed by the “Enter” key after each line.
- cd windows (Comment : You may replace “windows” with “winnt” as might be applicable to you)
- attrib +s fonts
- exit
Now restart the computer. The “Install New Fonts” option should now be available.
Changing Fonts
Changing the font on a Windows computer can help personalize and customize it to fit the user’s needs. The fonts in the Window’s folders and programs can be easily changed to fit the user’s personality/mood or simply for aesthetic purposes.
Follow these simple steps to customize the font displayed on the computer’s windows:
Locate the control panel via either the Start menu or the keyboard shortcut command (by holding the “Windows” key + “R” which will open up a Run dialog window). In the text field type in the word “control” and hit Enter or click “Ok” to open up the control panel.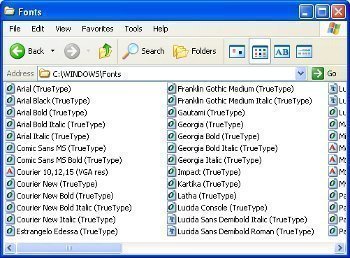
There are a number of items to choose from on the Control Panel.
- On the home screen (default option), click “Appearance and Personalization,” then click “Customize Colors.”
or
- From the classic view (click on classic view while in the home screen control panel to see classic view), find the “Personalization” icon and open it. Choose “Window Color and Appearance” from the Personalization panel.
Find a link at the bottom of the “Window Color and Appearance” window which says “Open Classic Appearance Properties for More Color Options.” This will take you to the Windows appearance settings. Simply click “Advanced…” to get to the “Advanced Appearance” window.
Here the user will see the classic windows that are on vintage versions of Windows or on the “Windows Classic” theme. Click “Active Window” and the settings on the bottom will change to the available options for the active window. Select font and change it to the style that the titles will be in.
Note: Using fonts with obscure characters might make it difficult to navigate back to the settings panel to change it again in the future.
Users can employ this method to change a variety of text options in the windows environment. Simply select “Ok” when finished and Windows will apply the new font settings.
Note: Not all programs will show font changes due to how they were created.

Hans J. HOlm
My “install new fonts was/is grayed out. Following your advice was not accepted. However, typing in the full path, at least was not objected and appearingly lead to the “Fonts” path.
However, when typing in “attrib +s Fonts”, cmd.exe told me, “file not found”
Windows 7 – What on earth is gong wrong here???
Best Hans