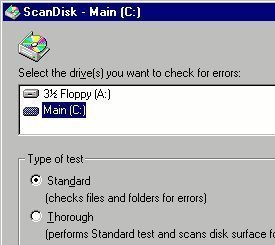
Scan Disk is one of the most common maintenance tools bundled with an operating system such as Windows. This is an application that checks the computer’s hard drive for errors and bad sectors. Once Scan Disk finds an error in the hard drive, it will attempt to fix it.
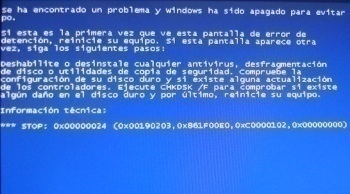
There are a number of reasons for the errors found inside a hard drive. These include:
- frequent system crashes
- critical system applications that have been improperly closed
- the existence of harmful programs such as viruses, trojans, etc.
Scan Disk is designed to repair damaged hard drive sectors and clusters on your computer’s hard drive. The majority of errors detected with the utility programs permit the application to recover the data stored in the damaged regions of the hard drive. When Scan Disk finds a bad or damaged cluster during a scan, it will move the information stored in that cluster to a new location on the computer’s hard drive. Scan Disk also checks and repairs the integrity of file systems such as FAT, FAT32, NTFS, etc.
Scan Disk requires exclusive access to a drive when it executes. Hence, if one or more of the files are open on the drive that you want to scan, Scan Disk may display a prompt asking if you want schedule the drive check for the next time that you restart your computer.

Once Scan Disk finishes its task, it provides a report that contains the errors it has found and the amount of disk space it has scanned. It is therefore important for users to use the Scan Disk application because it ensures that their data is safe from being corrupted. Aside from this, there is a guarantee that their computer will perform at optimum levels.
The earliest Scan Disk version appeared in MS DOS 6.2. In Windows 95 and 98, Scan Disk was given a graphical user interface (GUI). In this graphical environment, the user can find:
- progress bars
- buttons
- information regarding the status of the scan and the errors (if any)
How to Run Scan Disk in Windows 2000 and Windows XP
- Press the Start button on desktop
- Double click on My Computer
- Highlight the disk to be scanned for bad sector on the list of Hard Disk Drives.
- Open the File menu and select Properties option
- Select the Tools tab
- Click the Check Now button
- The scanning process will then initiate
How to Run Scan Disk in Windows Vista
- Click the Computer icon on the desktop
- Right click the drive to be scanned with Scandisk and select Properties
- Click on the Tools tab. Under the Error-checking sub heading, click the Check Now button
- A window named Check Local Disk will appear. To attempt to correct errors, check the Scan for and attempt recovery of bad sectors checkbox
- Click Start to initiate the disk scan. In Vista, it is required to schedule the Scandisk to run at boot time as Vista has mechanisms that do not allow it to run while the system is operating.
Run Scan Disk on Windows 7
In the deployment of Windows 7, the Scan Disk utility underwent a name change and is now called “CHKDSK” that performs the same functions as the legacy application for the Operating System.
Run CHKDSK Using the Grapical User Interface (GUI)
Step 1 – Select the “Computer” option from the start menu.
Step 2 – Right click the drive to check for errors followed by clicking the “Properties” menu button.
Step 3 – Select the “Tools” menu option followed by the “Check Now” menu button.
If the computer drive is in use, the Operating System will display a dialogue menu asking if you desire to schedule a full scan in the future.
Run CHKDSK from the DOS Command Prompt
Alternatively, CHKDSK can be ran from the DOS or Command prompt on the Windows 7 OS.
Step 1 – Open the DOS prompt on your computer by selecting the “Start” and “Run” menu options.
Step 2 – Enter “cmd” followed by the “enter” key to open the command prompt.
Step 3 – Enter “chkdsk c:” to initiate a system check of the local hard drive. If you desire all errors to be fixed through invocation at the DOS prompt, enter “CHKDSK c: /F /R” to find and fix all errors on the local drive. If your hard drive is labeled with a different letter than “c” just replace the letter in the above example with the actual hard drive letter on your computer.


Wyndham Halswell
I have 3 USB 3.0 Flash Drives, 2 of which failed to accept the chosen password
Both drives have nothing on them
How can I reactivate them?
Lisa
If I am experiencing an I/O error on a HDD that I can only see if booted up in safe mode, can I run scan disk and will it fix this i/o error in safe mode? Or have I lost everything? Is there any other way to get my data back on this drive (not the primary system drive) on my own without paying a high priced service?
memenode
If you can see it in safe mode can’t you access your data that way? If USB or DVD drive functionality is missing in safe mode you could try doing a selective startup and enabling the components for your DVD drive or USB.
Also, while I’m not sure it will solve the I/O issue it probably couldn’t hurt to try scandisk and see if it finds and fixes any problems.
Will.Spencer
That’s terrible support from a vendor. 🙁
There should be some disk healthy checking software on your older model — but the documentation is not longer available online. 🙁
I’d be tempted to take the disk out of the NAS enclosure and mount it directly in a PC. Depending upon how Iomega engineered it, the data may or may not be readable. Probably you can format the drive to test it’s health and them reformat it once you put it back into the Iomega NAS enclosure.
I have a QNAP NAS here and I am very happy with it. Your experience certainly warns me away from Iomega.
Will.Spencer
Take a look through the user manual here: http://www.iomega.com/support/manuals/ix-series/221-0809/en/consolidated/main.html#ix2200
It looks like almost everything that can be done is done automatically. What do you see on your Dashboard Status display?
Salam ELIAS
I have network attached external hard drive and doubting that it has some issues. Tried to use chkdsk but Windows reported thta it cannot check a disk attached through a network.
I googled and read about so many softwares that do SMART….disk fixing and monitoring but I can not find one that can diagnose a network attached one.
Thanks for your help